Tuesday, May 31, 2011

Filipino Pork Adobo Singlish Swenglish

Filipino Pork Adobo Singlish Swenglish

Hej all! I'm in Paris now for work and leisure but I thought I would update my blog while I have half an hour to spare. I never knew about this dish until my friend in London, Evelyn emailed me on Facebook about it, along with the recipe since she knows I'm always keen to try new things and it's one of her favourite dishes. She likes to add hard boiled eggs to the dish towards the end but I chose not to do so. In some way, this dish reminds me a bit of the Chinese pigs' trotters, only a dark vinegar is used and it is more sweet than sourish, like this dish. It keeps quite well too and is a perfect accompaniment to rice or if you just have a craving for something sourish-saltish. I've modified and combine a few recipes I searched to come up with this version.

Ingredients
500g pork, cut into cubes
1/2 cup white wine vinegar
1 head of garlic, finely chopped
2 pcs bay leaves
1/2 cup light soy sauce
1 cup water
1 teaspoon white whole peppercorns
1 teaspoon fresh ginger, finely chopped
Half an onion, chopped
2-3 medium size potatoes, cut into similar size cubes as the pork

Filipino Pork Adobo Singlish Swenglish

Steps
  1.  Brown the pork cubes in a pot with a little oil.

    Filipino Pork Adobo Singlish Swenglish
  2. Add in the garlic, ginger and onions and stir fry it for a while.

    Filipino Pork Adobo Singlish Swenglish
  3. Add in the water, vinegar and soy sauce and mix well.

    Filipino Pork Adobo Singlish Swenglish
  4. Add in the bay leaves, peppercorns and bring it to boil before lowering the heat to let it simmer until the pork is tender and soft.

    Filipino Pork Adobo Singlish Swenglish
  5. Add in the potatoes cube when the pork is about half way cooked to the tenderness you desire. If the water level runs down, just add some to top it up a little. The idea is that it is not a stew but a dish with more gravy than usual.

    Filipino Pork Adobo Singlish Swenglish

    Filipino Pork Adobo Singlish Swenglish

Saturday, May 21, 2011

Mee Soto Chili

My Sister's MIL mee soto chili

I thought I better post this simple but really good and essential condiment to mee soto, which I had last made in April, before I forget. My sister's mother-in-law is a great cook and this is also from her if you decide to make Mee Soto yourself, or I think it can go with anything. It has a real kick since it uses chili padi, or bird eye chili.I have modified it a bit so it can be easily made here in Sweden.

Ingredients
3 large green chilies
3-4 chili padi
1/2 red onion
3-4 garlic cloves

Steps
  1. Using a food processor, blend all the ingredients together.  If you like the old fashion way, you can use the mortar and pestle too. Process it until quite fine.
  2. Pour the mixture into a frying pan and fry it without oil for about 3-5 minutes, until the moisture has evaporated and it is coming together like a paste.

    My sis's MIL chili for mee soto
  3. Add about 1-2 tablespoons oil and continue frying over medium heat, stirring it frequently. When it is all fragrant and paste-like, it is done.
  4. You can store it when it has cooled down in the fridge for up to a week. To use it, just take the amount required and add it directly to the mee soto soup, or if you like, add a bit of soy sauce to it before using it as a dipping sauce.

Tuesday, May 17, 2011

Jamie Oliver's Baked Cauliflower and Broccoli Cannelloni

Jamie Oliver's Baked Cauliflower and Broccoli Cannelloni

I got 'Jamie at home' as a gift a while back but to be honest, I haven't had the chance or inclination to try most things from the book as much as I've enjoyed watching the television series that demonstrated the recipes. Some recipes centers around rabbit or pheasant meat (which is not that common in Sweden, maybe at gourmet shops) or it's a really long list of ingredients that needs to be assembled and I was just feeling lazy.

However, I had some cauliflower and broccoli on hand when I thought about trying this (it was the season for them and they were quite cheap) and as my dear Johan doesn't like either of this vegetables, I thought this might be a good way to 'introduce' it to him. He did accept it the first bite (because it's a combination of pasta, cheese and tomatoes after all) but when he knew what was inside the cannelloni - well, I ended up finishing the dish over a period of time. (It's quite a large portion!)

However, I will make this again, I think it's a pretty good recipe and if you like a change from the usual lasagne-like dishes and not averse to these two vegetables, you won't regret it. It's quite heavy though, so a small portion goes a long way for each person. This maybe classified as vegetarian, except for the use of anchovies (not the Chinese kind), but I think it can be omitted and still be a nice dish for a vegetarian option at your dinner party.

Ingredients (It said serves 4-6, I think it can serve up to 8-9 persons)
salt and pepper for seasoning
500g broccoli, washed and cut into florets with stalks chopped
500g cauliflower, washed and cut into florets, stalks chopped
olive oil
7 cloves of garlic, peeled and finely sliced
a small bunch of fresh thyme (I used about 2-3 teaspoons of dried thyme)
1 tin of anchovies in oil (about 25g tin), drained and chopped, reserve the oil
2-3 small dried chillies, crumbled
500ml passata or 1 box of tomato puree
red wine vinegar
500ml creme fraiche
200g Parmesan cheese, finely grated
16 cannelloni tubes
a small bunch of fresh basil, leaves picked
200g mozzarella cheese

Jamie Oliver's Baked Cauliflower and Broccoli Cannelloni

Steps
  1. Boil the chopped cauliflower and broccoli in a saucepan of salted boiling water for about 5-6 minutes until cooked. Drained and reserve some cooking water.

    Jamie Oliver's Baked Cauliflower and Broccoli Cannelloni
  2. In a large saucepan, heat up 2-3 tablespoons of olive oil and add in the garlic to fry for a few seconds. Add in the anchovies, thyme, anchovies oil and chili to fry for a few more seconds before adding in the cooked broccoli and cauliflower. Mix well.
  3. Add in about 4 tablespoons of reserved cooking water to the mix and cover, let it cook on low-medium heat for about 15-20 minutes stirring regularly. They will become like mash (but that's the intention!), but be careful not to burn it. Remove the cover for the last 5 minutes to let the moisture evaporate and mash it up with a potato masher.

    Jamie Oliver's Baked Cauliflower and Broccoli Cannelloni
  4. Season the vegetable mix with salt and pepper and spread it out on a tray to cool.

    Jamie Oliver's Baked Cauliflower and Broccoli Cannelloni
  5. Use a baking dish big enough to fit the cannelloni tubes snugly side by side. Add a pinch of salt and a tablespoon of red vine vinegar into the passata/tomato puree before pouring it into the baking dish, spreading it out if necessary.

    Jamie Oliver's Baked Cauliflower and Broccoli Cannelloni

    Jamie Oliver's Baked Cauliflower and Broccoli Cannelloni

    Jamie Oliver's Baked Cauliflower and Broccoli Cannelloni

  6. For the white sauce, mix the creme fraiche with half the Parmesan cheese, a sprinkle of salt and pepper with a little reserved cooking water to thin it down. Set aside.

    Jamie Oliver's Baked Cauliflower and Broccoli Cannelloni
  7. Spoon the cooled cauliflower and broccoli mixture into a sandwich bag and cut off one corner so you can pipe the mixture into the cannelloni. Fill the tubes up, it will be enough. Preheat the oven to 190°C.

    Jamie Oliver's Baked Cauliflower and Broccoli Cannelloni
  8. Place the filled cannelloni in a single layer on top of the tomato puree and lay the basil leaves over.

    Jamie Oliver's Baked Cauliflower and Broccoli Cannelloni

    Jamie Oliver's Baked Cauliflower and Broccoli Cannelloni
  9. Spoon the white sauce over, season with some black pepper.

    Jamie Oliver's Baked Cauliflower and Broccoli Cannelloni
  10. Sprinkle over the remaining Parmesan cheese and tear and spread over the mozzarella.

    Jamie Oliver's Baked Cauliflower and Broccoli Cannelloni
  11. Drizzle over with olive oil and bake in the preheated oven for 30-40 minutes until golden and bubbling on top. Jamie Oliver's suggestion is to have it with some rocket leaves dressed with a squeeze of lemon along with some crusty bread. I just have it as it is. :)

    Jamie Oliver's Baked Cauliflower and Broccoli Cannelloni

    Jamie Oliver's Baked Cauliflower and Broccoli Cannelloni

    Jamie Oliver's Baked Cauliflower and Broccoli Cannelloni

Wednesday, May 11, 2011

Sweet and Sour Crispy Fish

Singlish Swenglish Sweet and Sour Crispy Fish
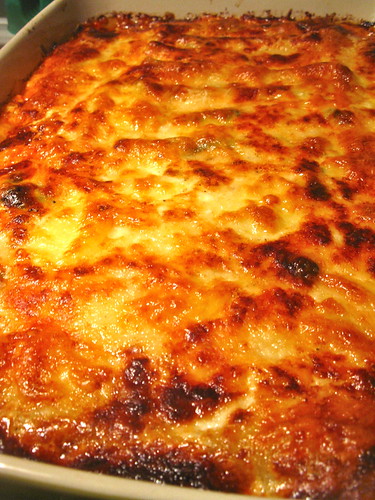
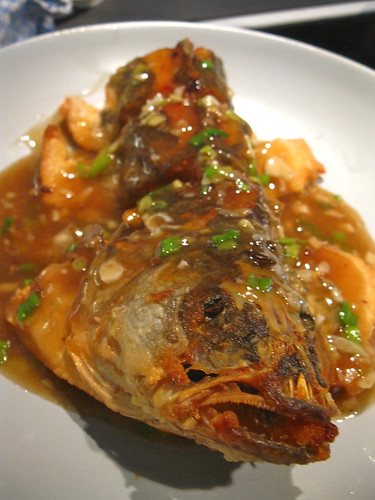
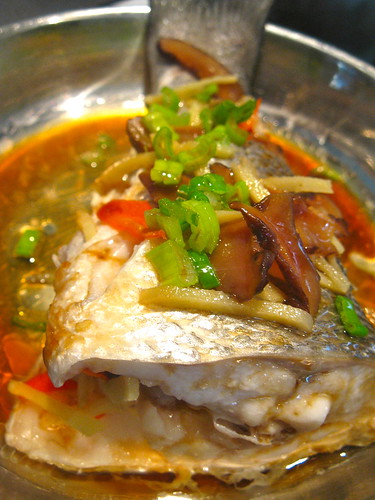
Bwah! I'm crispy and delicious - Eat me!

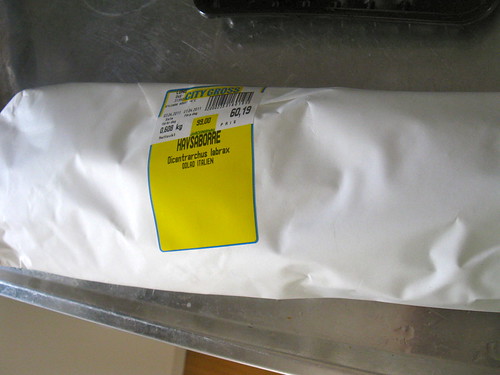
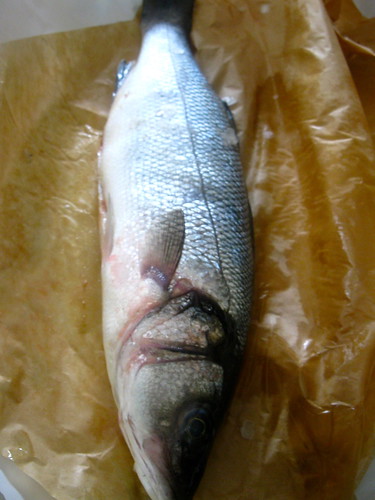
Ok, I'm just having some fun with the captions. You should see the fish my Dad caught, it would have been perfect for this dish!

The fish my Dad caught one of those weeks
, photo courtesy from my sister
Back to this - this was the other half of the fish from my previous post. It would have been prettier making the whole fish but it was my first try, and it's always wise to start kinda of small. This is from Fushia's other book, which is equally good and definitely something you can aim to make for your next Chinese New Year dinner as she commented, it's a real party piece! This recipe was for the whole fish but I halve it for my half-a-seabass.

Ingredients
1 seabass (about 500-600g including the head, gutted and cleaned)
Plenty of cooking oil for deep frying

Marinade with
1 tablespoon Shaoxing wine
3/4 teaspoon salt
2 spring onions, white and green parts
2 inch piece fresh ginger, unpeeled

For the sauce
1 tablespoon light soy sauce
4.5 tablespoons sugar
2 teaspoons Shaoxing wine
1/4 teaspoon salt
4 teaspoons cornstarch
3 tablespoons chicken stock (I used a chicken stock cube to dissolve in hot water accordingly and use from it accordingly)
3 teaspoons finely chopped fresh garlic
3 teaspoons finely chopped fresh, peeled ginger
4 spring onions, finely sliced, white and green parts separated
1.5 cups stock
3 tablespoons black Chinese vinegar
2 teaspoons sesame seed oil

For the starch coating
3/4 cup cornstarch (yes that much, with some extra on hand)

Steps
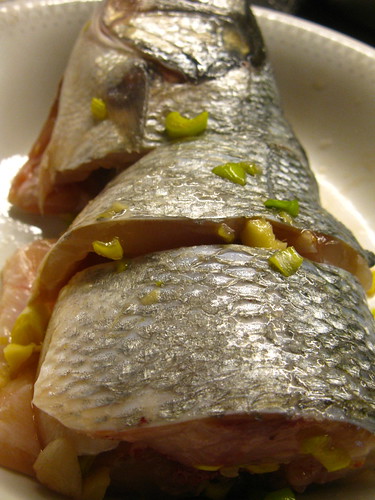
  1. 'Lay the fish on its side and using a sharp knife, cut down into the thickest part of the fish near the backbone, about 2 inches from the base of the fish head and at right angle to the backbone itself. When the knife touches the bone of the spine, swivel the blade inside the flesh to face the head and continue cutting parallel to the backbone and toward the head for about another 1.5 inches. This will create a thick flap of fish flesh.' This is taken word for word from her book and it's really good detailed instructions. Continue making the same cuts at 2 inch intervals until you reach the tail and repeat on the other side. Be careful not to slice the whole flap of fish off!
  2. Pour the Shaoxing wine over the fish and rub it and the salt into the flaps and cavity also to marinade. Roughly chop the ginger and spring onions and stuff into the cavity and flaps of the fish to marinate for about 30 minutes while you prepare the other ingredients.

    Singlish Swenglish Sweet and Sour Crispy Fish
  3. For the sauce, combine the soy sauce, sugar, wine, salt, cornstarch and stock in a small bowl and set aside.
  4. For the starch solution that will be used to dredge the fish in, mix it with enough water gradually (should be around 1/2 cup) so it is fairly thick but drippy.
  5. Heat the oil till about 162°C to prepare to fry the fish. Remove the ginger and spring onion bits and pat dry with paper towels before smearing it with dry cornstarch (about 3 tablespoons) inside and out.
  6. Hold the fish by the tail and coat it with the cornstarch paste, using your fingers if necessary to spread it in between the flaps. Hold it by the tail and lower the fish head first into the oil to let it fry for a few minutes as you ladle hot oil over the body and flaps of the fish to fix the position of the fish in its place. Immerse the whole fish when the flaps are in open position and fry for another two minutes. Remove and let it rest on its belly on a plate.
  7. Reheat the oil to 200°C and immerse the fish again to fry for a few more minutes until the whole fish is crispy and golden. Remove it, drain it of oil and set aside while you prepare the sauce.

    Singlish Swenglish Sweet and Sour Crispy Fish
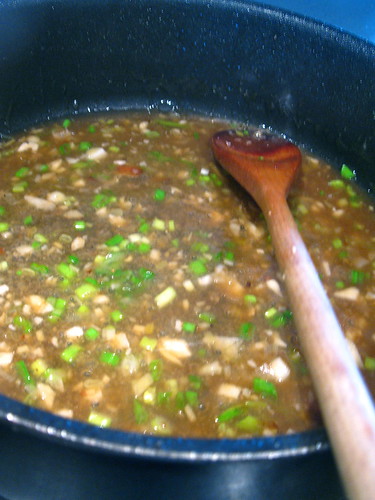
  8. Using about 3 tablespoons oil from the frying in a clean wok, heat it up over high flame and add in the ginger, garlic and white spring onion sections until fragrant. Add in the stock and bring it to boil.
  9. Give the sauce ingredients a stir before pouring adding it to the wok, it should thicken fairly quickly. Turn off the heat and add in the spring onion greens, vinegar and sesame seed oil into the sauce and pour it over the fish and serve.

    Singlish Swenglish Sweet and Sour Crispy Fish's sauce

    Singlish Swenglish Sweet and Sour Crispy Fish

Tuesday, May 10, 2011

Steamed Fish with Shiitake Mushroom and Chillies

IMG_0459

When I was in Singapore, I rarely had to buy fish; it was my Dad's 'duty', either to buy it or fish it. So you can say our family grew up with eating lotsa of fish, which was quite different for Johan's family. Here in Sweden, fresh fish are generally quite expensive (even more than beef at times) and it's more common to buy frozen salmon fillets or cod fillets, which comes without the skin. So you can imagine it won't be very nice steaming them.

Recently, however, I started to pay more attention to fresh fish and I was delighted when they had fresh sea bass on sale (about 20SGD per kg), which makes it quite 'affordable'. So I got about 3 of them and the first dish I made was steamed fish, following Fushia Dunlop's recipe but omitting the ham part and adding a dash of soy sauce, as my family would do it.
IMG_0425
Called Havsaborre, or sea bass or Kim Mak Lou

IMG_0427
Told my Dad I 'caught' a fish from the supermarket

I didn't use the whole fish, but the tail part of it (which I really like), so you can adjust the seasonings accordingly but it's all very simple ingredients. If you get the fish from the fish monger, remember to check that it is descaled because it's quite messy to do it at home otherwise. The key is not to overcook the fish and of course to eat it immediately after steaming. Which is why it's always the last thing to be cooked and has to be timed exactly by my Dad to the last minute when the final family member arrives for dinner.

Ingredients (for the tail part - about half of a 600g sea bass)
2 dried medium size shiitake mushroom
Half a sea bass (about 300g)
1/2 tablespoon Shaoxing wine
salt
10g fresh ginger
1 fresh chilli
1 small spring onion, green and white sections separated
2 tablespoons cooking oil
1 tablespoon light soy sauce


Steps
  1. Soak the mushrooms in hot water in a small bowl for about 30 minutes before you begin cooking.
  2. Make a few diagonal slashes into the thickest part of the fish on each side and splash the fish inside and out with the Shaoxing wine and rub on a little salt and set it aside while you prepare the other ingredients.
  3. Discard the seeds of the chili and cut into thin slices. Drain the mushroom and cut into silvers like the chili. Peel the ginger and cut into silvers too. Mix all these with a pinch of salt.
  4. Rinse the fish under cold running water and pat dry. Place onto a metal plate that will fit your steamer.
  5. Smash the white part of the spring onions with the back of a knife and place into the cavity of the fish. Strew over the combined ginger, chili and mushroom, placing some in the cavity of the fish too. Drizzle over 1 tablespoon of cooking oil.

    IMG_0439
  6. Steam over high heat for about 8 minutes, until a chopstick slides easily into the fleshy part of the fish. Shortly before the fish is done, heat the remaining tablespoon of oil over high heat until really hot and sliced the spring onion greens thinly.
  7. Remove the plate from the steamer when ready, scatter the spring onion greens over the fish and drizzle with the hot oil and light soy sauce.

    IMG_0457

Sunday, May 1, 2011

Seared Salmon with Singapore Noodles

Singlish Swenglish Seared Salmon with Singapore noodles

This recipe is taken from Nigella Express, one of those books from Nigella that we use pretty often. The recipes are simple and can be quite interesting too. We call this our Swenglish dish since it marry the most common fish found in Sweden (salmon) and Singapore noodles (the thing that is only Singaporean about it is probably the curry powder. But to be honest, you'd never really find this noodle dish in Singapore itself). I did a poor job of searing the salmon (think it needs more oil to be seared and probably watched over :P) but Johan likes the dish and that's what it counts, right? ;) I made some modifications since Johan didn't like dried shrimps that was in the original recipe, so we just omitted it.

Ingredients (makes 2)
For the salmon 
2 salmon fillets, about 200g each
1 teaspoon curry powder
1/8 teaspoon salt
1/2 teaspoon sugar
1/2 tablespoon garlic oil (just lightly fry some garlic slices in the oil before using it if you don't have one ready-bought)

For the noodles
125g dried egg noodles, soaked in hot water to soften and drained
60ml Shaoxing wine
1/2 tablespoon garlic oil
50-80g sliced bak choy
60g baby corn
A packet of sugar snaps
1/2 teaspoon finely chopped ginger
125ml chicken stock
2 tablespoon soy sauce
1 -2 teaspoon curry powder (depend on how spicy you want the noodles to be, also depend on how spicy the curry powder is)
Singlish Swenglish Seared Salmon with Singapore noodles

Steps
  1. Mix the curry powder, salt and sugar in a shallow dish and marinate the salmon fillets in it and rubbing the mix in.
  2. Heat the oil in a pan and cook the fillet over high heat for about 2-3 minutes on each side, searing the sides of the fillet too if they are thick slices. Set aside while you fry the noodles.
  3. Heat the oil in the wok and fry the ginger, then add in all the vegetables and stir fry for a few minutes until they are about 70% done.

    Singlish Swenglish Seared Salmon with Singapore noodles
  4. Add in the curry powder, chicken stock, soy sauce and Shaoxing wine, mixing it well before adding in the noodles. Stir fry and make sure the ingredients are all mixed well  before serving it hot with the salmon fillet next to it.