Saturday, September 26, 2009

F1 Donuts

Ok, I nicknamed this F1 Donuts as I've made this as a surprise for the boys, when we watch the night race from Singapore tomorrow around 2pm, Sweden time. This is going to my first time watching it from Europe and also the first time I used this mini donuts pan I got from CK Tang. I was surfing around for a good recipe and came across this one from Beachlover's blog, but I made some modifications accordingly for my oven, and here's wishing Singapore a successful 2009 F1 event!

Makes about 36 mini donuts

Equipment
2 mixing bowls
Whip
Mini donuts baking pan

Ingredients
250g flour
110g sugar
1 1/2 teaspoon baking powder
2 eggs
125ml milk
1 teaspoon vanilla extract
4 teaspoon oil
4 tablespoon vanilla yogurt (or ordinary one, I just happen to have them for breakfast)
100g milk chocolate bar, for dipping the donuts
 
1. Mix all the dry ingredients in one bowl (flour, sugar, baking powder) and all the wet ingredients in another bowl (eggs, milk, vanilla extract, oil, yoghurt).
2. Pour in the wet ingredients gradually into the dry mix; you want to avoid a lumpy batter. The final consistency should be a thick and smooth mixture.
3. Butter the mould with a brush and scoop 1 tablespoon into each individual mould, they should be only half filled, so that your donut will have a hole in the middle.


4. Put the donuts into a pre-heated oven of about 165-170 degrees Celsius, top rack for about 15 minutes. This is to ensure it will brown evenly; you may need to adjust the rack accordingly, and watch the donuts after 10 minutes.
 
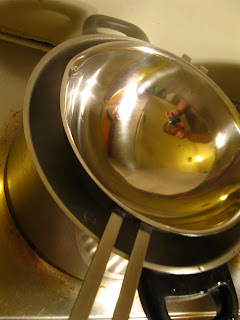
5. The final product should be spongy, like a cake. Let it cool while you melt about 100g of milk chocolate.
 
6. Dip each donut only half way (well, if you want it to be a full chocolate covered donut, just dunk it all in, but you will probably need more melted chocolate) and let it cool in a large flat cookie tray, making sure each donut does not touch each other.


7. If you feel like putting some icing instead, mix icing sugar and milk to get a thick glaze and add coloring accordingly. Do the same like dipping into the melted chocolate.
 
8. For assembling into the F1 shape, just use long wooden sticks and thread through accordingly.


Thursday, September 24, 2009

Sour and Spicy Soup

I went to Anderson Junior College in Singapore and there was a famous food stall in school that sells primary stir fry meat with rice and a sour spicy soup. It always has long Qs and most of us make it a point to spend 30 minutes of our break time to Q up for our lunch at this stall.

Came across this book at the city library and totally fell in love with it. Simply designed with a white background and titled 'Sichuan cookery', it was by this lady Fuchsia Dunlop. On first glance, I was somewhat skeptical about Chinese cooking written by someone with an English sounding name, but she actually spend time taking private classes at the Sichuan Institute of Higher Cuisine and after trying a few of her detailed recipes, I am declaring this a winner and I'm getting the book from Johan as a Christmas present (yes, he knows I'm terrible at waiting for surprises so he tells me some first).

So here's one of the first to come, one soup that will warm your tummy up for the upcoming autumn. Surprisingly, (or not) the spiciness from this soup comes from the fresh ginger and pepper, not any famous Sichuan pepper.

Serves 6-8

Preparation and cooking time required around 30 minutes, you basically just need a pot.

Ingredients
200g tender, lean pork, sliced into thin strips

Marinade the pork with:
1 teaspoon Shaoxing wine
1/4 teaspoon salt
1 1/2 teaspoons potato starch
2 teaspoons cold water

Other ingredients
4-5 Chinese dried mushrooms
1 can of tinned bamboo shoots
a 10g piece of fresh ginger
4 button mushrooms (optional)
100g cooked ham (you can use the breakfast or picnic ham slices)
3 spring onions, green parts only
1 teaspoon sesame oil
1 tablespoon groundnut oil
1.2 liters of meat stock (I use chicken cubes)
1 tablespoon Shaoxing wine
1 teaspoon light soy sauce
1 teaspoon dark soy sauce
salt to taste
ground white pepper or black pepper to taste
4 tablespoon potato flour mixed with 4-6 tablespoons cold water
3-4 tablespoons Chinkiang or black Chinese vinegar

Steps
  1. Soften the dried mushrooms in plenty of hot water to soak, refresh the tinned bamboo shoots by blanching them slightly in lightly salted boiling water.
  2. Marinade the pork in a small bowl, peel and thinly slice the ginger. Cut the button mushrooms, bamboo shoots (if they are not already sliced), Chinese mushrooms and ham to about the same slices as the pork slices. The idea is that you want to achieve the same kind of consistency for the soup with all the ingredients. 
  3. Prepare the serving bowl by sprinkling thinly sliced spring onion greens and drizzle over with the sesame oil.
  4. Heat the oil in the pot over high heat. Fry the ginger for about 30 seconds until it is fragrant but not brown, add the bamboo shoots, ham, dried and fresh mushrooms and stir fry a few time. Add the hot stock or add hot water and add 1 cube of chicken stock. Bring to boil.
  5. When it is boiling, skim away any scum and discard. Add the Shaoxing wine, light and dark soy sauce and season with salt and pepper. (If you like it spicier, add more pepper!) The final taste should give you a well-salted soup with the pepper giving you a spicy kick without overwhelming the other flavors.
  6. Add the pork strips and use a pair of chopsticks to separate them, when they are just about cooked, stir in the potato starch mixture to thicken the soup. Remember to stir the mixture and add in gradually till you reach the consistency you desire.
  7. Finally, turn off the heat and add the vinegar to give the soup a nice mellow sourness without it tasting vinegary. Pour it into the serving bowl with spring onions and serve immediately!


Monday, September 21, 2009

Singlish Shepard's Pie

One of our mutual favourite western dish is this Shepard's Pie from one of those mini cookbooks you find at supermarkets etc. Surprisingly though, this was bought on 12 February 2007 at Sentosa Cable Car Station Shop in Singapore. It was the first cookbook Johan has bought me and what I like about this was the surprising ingredient inside this pie - Chinese mushroom and oyster sauce, two very chinese items but since this book is titled 'Eurasian Favourites', I guess its nice how each culture has influenced each other to produce this nice pie which is a good dish to bring for potluck. You can vary the meat accordingly between lamb, beef chicken or mixed beef/pork, I have adjusted the recipe a little for our taste buds.


Serves 6


Equipment
Roasting Pan
Potato Masher
Fork
Egg wash brush


Ingredients for the topping

750g potatoes, peeled, boiled and mashed
3/4 teaspoon salt
1/2 teaspoon of freshly ground black pepper
3/4 lightly beaten egg
2 tablespoon butter
250ml milk (may vary according to texture of potato)
Dash of ground nutmeg (optional)


Ingredients for filling
3 tablespoons oil
2 teaspoon minced garlic
3-4 dried chinese mushroom, soaked and sliced thinly
500g minced meat
60g frozen peas (thawed)
2 tablespoon oyster sauce


Steps
  1. Prepare the topping by mixing the mashed potatoes with the salt, pepper, egg and enough milk to obtain a creamy mixture.
  2. Preheat the oven to 180 degrees celsius.
  3. In a pan, heat up the oil till its moderately hot and add the garlic. When it is slightly brown, add the mushroom and stir fry for about a minute. Once you are greeted by the delicious aroma of mushroom with garlic, add the minced meat and continue to stir fry the filling till the meat changes colour. That should take about a few minutes.
  4. Once you see the change in colour, lower the heat and add the peas, stirring continuously for about 3 minutes, then add the water, sugar, oyster sauce, soy sauce, sugar and pepper. Simmer till the water has been absorbed.
  5. Use a roasting pan or oval dish and put the filling in, pressing it down gently.

  6. Cover with a layer of the topping using the spatula. If you want to be fanciful, you can try pipping the topping on. Otherwise, a simple crisscross pattern can be made with a fork, but brush on the egg wash first, then create the pattern.

  7. Place it in the oven and cook for about 30 minutes. If the topping has not turned golden brown, just let the oven continue on top heating only for about 5 minutes (depending on how brown you want it to be).

  8. Serve it warm! If you are going for a potluck, and your friend has an oven, just bake it at their place for maximum enjoyment.  

Sunday, September 20, 2009

Alex Goh's Sandwich Bread

We got this book by Alex Goh from Robinsons Centerpoint in Singapore the day before we left for Sweden and boy was it a good buy! By baking our own bread, not only do I enjoy the baking process, Johan loves to eat freshly baked bread and we also saved quite a bit of money in the process. Just think, for the price of one loaf of commercial bread, I can buy enough flour to bake 8 loaves of bread. So here are the detailed steps to making your very own Sunshine/Gardenia bread :)

Makes one nice pretty loaf, but needs plently of time, overnight for resting two types of dough, plus actual assembly, waiting and baking needs around 3 hours, but its worth it once you plan for it. There are three types of dough involved here, so do follow the steps and I've tried to illustrate with photos as much as possible.

Equipment
Sandwich Bin (About 20cm x 11cm x 11cm)/Pullman's pan
Dough hook machine
Mixing bowl with lid
Cooling Rack

Ingredient A
75g bread flour (or Vetemjöl Special in Sweden)
53g of boiling water

Ingredients B
225g bread flour
10g milk powder
23g sugar
5g salt
5g instant yeast

Ingredients C
143g cold water
60g overnight sponge dough which consist of 50g bread flour, 30g water at room temperature and 1/8 teaspoon of instant yeast.

Ingredient D
30g butter

The night before...
  1. ...you want to bake, prepare the first two types of dough so that you can rest them overnight in the fridge. For the first type listed under Ingredients A, add the boiling water into the flour, mix until well blended to form dough. Be careful and use a spatula to mix it. Cover it, let it cool down and keep in the fridge for at least 12 hours.
  2. For the second dough, which is the overnight sponge dough as mentioned under Ingredients C, mix water and yeast till well-blended, add to the flour and mix to form dough. Let it proof for 30 minutes before wrapping it up to rest in the fridge overnight.


  3. The next day, get ready your dough mixer and measure out Ingredients B. Mix them until well blended. Add in the cold water, and Ingredient C (the overnight sponge dough - you can tear them into smaller pieces and add them while your machine is running) to form a rough dough. Add in Ingredient A (the boiling water dough) and knead until well-blended.


  4. Add in Ingredient D and knead to form an elastic dough. Cover the mixing bowl and let it proof for 60 minutes.


  5. Divide the dough into 3 equal pieces and mould it round. Let it rest for 10 minutes.
  6. Flatten the dough and roll it up like a Swiss roll. Let it rest for 10 minutes and repeat this process one more time, then place the 3 pieces of dough into the greased tin.
  7. Let it proof for 50-60 minutes or until 80% full. Cover with lid.

  8. Bake at 220 degrees celsius for 35 minutes. Remove immediately when it is baked.


Finished product :)


Wednesday, September 16, 2009

Swedish Cheesecake Ice-Cream

First tasted this when Tobias, Johan's brother made it for a New Year's Eve party. He said he got it from his mom, but whoever it was from, it's here to stay. Its good for those who don't like to bake as this doesn't involve any baking, but plenty of 'whipping'. If you don't possess a electric whisk, CAUTION is given here, you will grow some biceps and burn off calories during the preparation, which will be immediately put back once you have this delicious, creamy and crunchy dessert melting in your mouth. Johan took big servings of it for two nights in a row!

Time Required
Preparation time around 30 minutes;to eat it you need at least 24 hours.


Ingredients
250g Philidelphia Cream Cheese (or the 200g pack would be fine too)

3 eggs
2 dl sugar (that's the IKEA measuring spoon, the biggest one which would otherwise measure 100ml of liquid)
1 tablespoon vanilla sugar (or 1.5 teaspoon vanilla extract)

1 pinch of salt
3 dl double cream
4-5 pieces of digestive biscuits (crushed as fine or coarse as you wish)
butter for greasing the pan or container and for binding the biscuits


Equipment
Electric whisk
Measuring spoons
3 bowls
for whipping the cream, egg white and the rest
Freezer bag for putting the biscuits in and crushing them with a mortar
Plastic cling wrap
Pie dish or loaf pan for assembling the final product


Steps
  1. Mix cheese, sugar, salt and egg yolks with electric whisk.
  2. Whip the cream in a separate bowl till soft peak, and the egg whites in another clean bowl till stiff peak is formed.
  3. Fold the cream into the egg yolk mixture first, and then fold in the egg whites into the mixture, taking care not to over mix them. You want to retain as much 'fluffiness' as possible.
  4. Press the crushed biscuits which are lathered with some butter to bind them together onto the bottom of the pie dish or loaf pan. This has to do with how you want to serve them, like cheese cake slices (in the pie dish) or like ice-cream which you can scope out (from the loaf pan).
  5. Once the bottom layer is done, pour the mixture over and cover with two layers of plastic cling wrap. Freeze (yes, where you make ice) for at least 24 hours.
  6. When you are ready to serve, take it out 25-30 minutes prior, you can decorate it with those metallic but edible ball bearings looking things (they looked pretty!) or just as it is.


Enjoy!

Tuesday, September 15, 2009

Sasa's Homemade Kaya

This is actually my second time making kaya, well..reason being I was back in Singapore and didn't need to make it. It was available everywhere!I explained this to Johan as a custard of some sort, only it is made with coconut milk and we use it as a jam.

Since I am now back in Sweden and with autumn coming, kaya toast (with my own homemade bread) sounds even more tempting than ever so I did some research and came out with this proven recipe for kaya. Especially for those of you who like to control how sweet your kaya is, this is quite simple and easy to do :), this yields about 100-150ml of kaya which you should keep in the fridge.


Preparation Time
Around 30-45 minutes

Equipment Required
Deep pot for boiling water
Bowl for placing over pot of boiling water
Sieve
Whisk

Ingredients

3 large eggs (or 4 small eggs)
200ml of thick coconut milk (you can get those tinned ones)
100g sugar (you can lessen this if you like)
1-2 tablespoons of brown sugar and a little water


Steps
 Getting the ingredients ready

And of course not forgetting the equipment, which you need to double boil it or cook it over a pot of water. We got this bowl thing from IKEA which we can just stick it over a pot of boiling water, it can be use to melt chocolate too :)

First, whip the eggs, then add in the sugar, whip till they dissolve and then add in the coconut milk.
 
Meanwhile, you can also start to caramelize the brown sugar. They help to add colour, but I rather like the Yeo's canned kaya bright orange, maybe next time I will try with the orange/red sugar...which I can only get when I visit Singapore again I guess. Keep an eye on the caramelizing!


Ok...back to our egg/coconut milk/sugar mixture, sieve it onto the bowl over the pot of boiling water. This is so to reduce the air bubbles etc.

Take a whisky and get ready to stir it frequently and scrap down the sides! Some recipes called for 1 hour of constant stirring, but mine started to thicken after around ten minutes. Remember not to fill up the pot with water that touches the bottom of the bowl, you should be using the 'steam' as the heat source, but of course you can top up with hot water when the water level goes down.


This is how it should be looking when it thickens. Kind of like how you want your consistency of your jam to be. Remember it will be even thicker once it cools down so don't cooked it till its too hard to stir.
Then you can add in the caramelized brown sugar, you can control how dark you want the colour to be. This looks quite authentic right?
And this was my kaya toast with butter this morning :)