Thursday, January 28, 2010

Min Svärmors Middag

Det var min svärmors födelsdag i förra torsdagen och vi lagade kinesisk mat till hela familjen. Det här är vad vi hade till hennes födelsdagsmiddag:

birthday dinner for mother in grace

It was my mother-in-grace birthday last Thursday and we cooked Chinese food for the whole family. These are what we had for her birthday dinner:

Pot stickers as starter
Jiaozi 餃子 as a starter


Sweet and sour pork
Sweet & Sour Pork
Söt och Sur Flaskött

Anka brost med paprika
Duck Breast with Red Pepper and Spring Onions
Anka brost med paprika och salladslök

Broccoli with shitaki mushroom and dried scallop sauce
Broccoli with braised shitaki mushroom in dried scallop sauce
Broccoli med shitaki svamp och tork pilgrimsmussla sas

Fisk med purjolök
Sea bream with braised leeks, chili and ginger
Fisk med purjolök och chili och ingefära


Tiramisu for all
Tiramisu to end off as dessert
Tiramisu till efterrätt

Recipes for the above will soon follow, keep a lookout :)

Wednesday, January 27, 2010

Chocolate Pear Pudding with Warm Chocolate Sauce

Chocolate pear pudding

I'm not the greatest fan of chocolate, but this dessert is an exception. Somehow, the grainy texture of pear and chocolate with warm chocolate sauce clinched this deal for me, not to mentioned this was made by Johan himself from the recipe which can be found in Nigella Express.

Ingredients - serves 3-4, measurements are halved from original
1 can pear halves in juice
62.5g plain flour
12.5g cocoa powder
62.5g castor sugar
75g butter plus extra for greasing
1/2 teaspoon baking powder
1/8 teaspoon bicarbonate of soda
1 egg
1 teaspoon vanilla extract

Steps
  1. Preheat oven to 200 Degrees Celsius and grease a square ovenproof dish with butter
  2. Drain the pears and arrange them on the base of the dish. 1 can should have 6 halves.


    Chocolate pear pudding


  3. Put all the remaining ingredients in a food processor and run it until you have a batter with a soft dropping consistency. If you find it too dry, add a tablespoon or two of milk.
  4. Scoop and spread the batter over the pears and bake for about 30 minutes.


    Chocolate pear pudding


  5. Let it rest out of the oven for about 5-10 minutes and either scoop or cut into slabs to serve with chocolate sauce.


    Chocolate pear pudding

    To make the chocolate sauce, just melt about 40g dark chocolate, 60ml cream, 1/2 tablespoon golden syrup and 1 tablespoon coffee powder dissolve in 1 tablespoon water (optional) in a bowl over a pot of boiling water. You can use this for brownies too.

    Chocolate pear pudding


Monday, January 25, 2010

Making Kim Chi

Korean kimchi

It never really crossed my mind to make my own Kim Chi until a friend passed me some she made herself while we were in Lund two years ago. Since then, I have been trying to find a easy recipe to try and I finally found it here, at Dr Ben Kim's site which has detailed steps you can follow to make your own. I did some changes particularly to the Korean pepper powder which after some research I felt can be substitute with a mix of paprika and chili powder you can find in any spice rack in a supermarket. SoooOOoo....I tried it and it was quite successful and you can vary how spicy you want it to be by adjusting the amount of chili powder you want in it. So here's my take on making Kim Chi:

Ingrediants
1 chinese cabbage or napa cabbage or da bai cai, about 400-600g
3 tablespoons of paprika powder
3 tablespoons of chili powder
3 tablespoons of salt
About 50-80ml warm water
1 tablespoon minced garlic
1 tablespoon minced ginger
half a ripe apple, grated & half a ripe chinese pear, the kind with yellow skin grated and both mixed with about 200ml of water.
2-3 spring onions, sliced thinly
2 tablespoon fish sauce

Steps
  1. Cut up the cabbage into 2cm chunks and put it in a bowl.

    kineskakal

  2. Sprinkle the salt over the cabbage, mix it up and let it rest for about 4 hours. The salt is supposed to draw out the water from the cabbage and also act as a preservative of sort. You should expect them to be limp like this:

    Salted chinese cabbage

  3. And here's my substitute for the Korean pepper, I mix it up with the warm water to form a paste. It may not look like much, but believe me, it will be enough:

    Homemade paste

  4. Add in the paste, garlic, ginger, apple & pear mixture, fish sauce and spring onion. Mix it all up together and this will be your kimchi:

    kimchi with pear, apple, onion

  5. Bottle it up and let it stand at room temperature for 24 hours and you can keep in the fridge for at least a month. According to Dr Kim's site, the longer you keep it, the more sour it gets as it ferments. I like to eat mine with the Korean pancakes :)


    Kimchi bottled

Sunday, January 24, 2010

Sweet Glutinous Rice Wine or Tian Jiu eller Söt Vine

The last few months I have been intrigued by the world of micro-organisms in the kingdom Fungi. It started off when a classmate pass me 'Herman', who is currently still residing in my fridge. He has a brother call 'Ryeman' - since he was made of rye. This is his cousin Xiao ming - a Chinese product as a offshoot from the same process refer to as fermentation.

Ok, if you still don't get it, please go to this link about yeast, yes, yeast. What did you think I was talking about?

If you have done baking, you would know how vulnerable yeast are, you can kill it just by the subtle change in water temperature. Of course, for those of you who don't bake, its the thing that helps make your bread all nice and fluffy. Nothing pleases a baker more than a successful risen dough.

I will post up my sourdough project soon, but here's a Chinese take on the use of yeast. It all started when my friend Sylvia (you know her, the one who sends me Le Creuset stuff from UK, you should visit her blog btw) and her mom sent me some wine yeast and red rice for making sweet glutinous wine. It also happened that I have a classmate from China whose mom makes the wine herself and the third ingredient that clinched this project was that in the book 'Revolutionary Chinese Cookbook' by Fushia Dunlop, she had a recipe to make this too.

So here's the process of making Xiaoming, with the help of my classmate Xiaoyun:

Ingredients
You need:
250g glutinous rice (the kind for making zong zi or sticky rice)
400ml water
1 wine yeast ball (Sylvia and her mom sent me 4!:))
Handful of red rice
A clean tall glass or earthen container, I got mine from Ikea

This is how they look like:


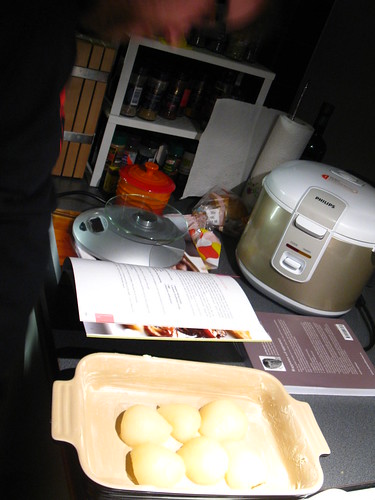
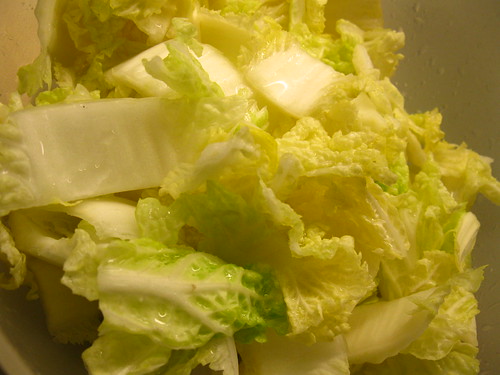
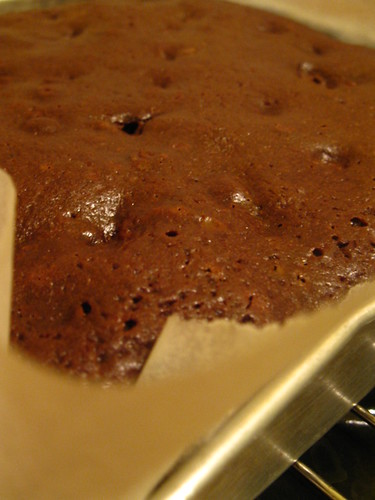
So to begin the process, rinse the glutinous rice in cold water until the water runs clear. Place both the rice and water in a rice cooker and cook till it it done. Otherwise, you can steam it until they just turn tender. Spread it out to cool on a large flat surface, I used my baking tray.

Sweet Glutinous rice wine in the making

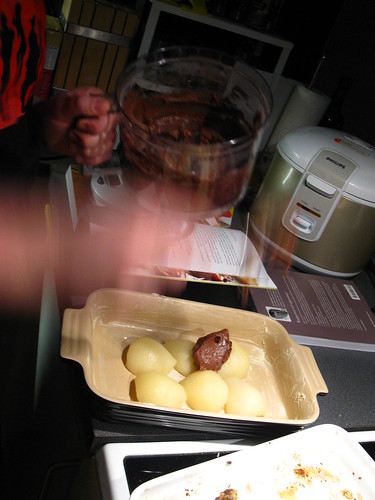
While waiting, crush the wine yeast into fine powder using a mortar and pestle. As we were not sure of the strength of the wine yeast, we used half of 1 wine yeast that we got from Sylvia for the amount of rice mention. When the rice is cooled, scatter them all over and mix well using a chopstick. Scatter some of the powdered yeast at the bottom of the container first before adding the rice mixture:

After 3 days

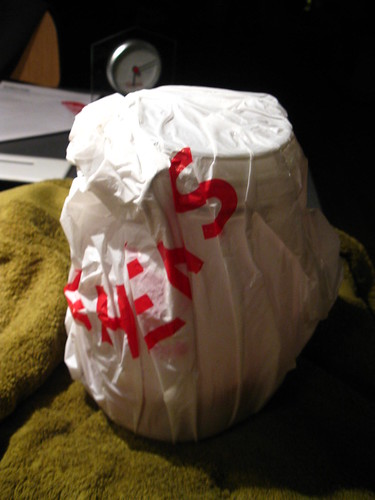
Close the lid, but not airtight. This should be done very quickly once you have mixed the yeast with the rice, the idea being you should keep it as warm as you can. We used a rubber band to close the lid of the container we got from Ikea instead of the lever that comes with it. Then we wrapped it up first with a plastic bag, then a thick towel around it, then another plastic bag and we set it near the biggest heater in the house. Then wait for about 3 days before you open it. 
 
This was the second layer after we removed the outermost plastic bag:

rice wined wrapped up nice and warm, second later


Then the final layer:
first layer

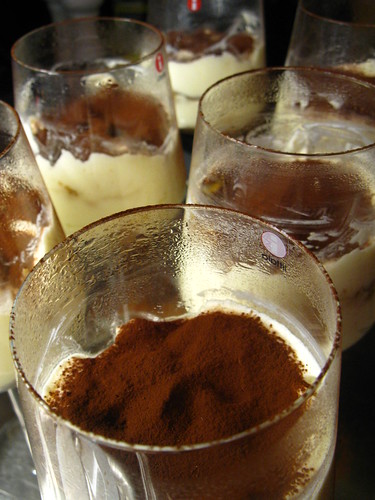
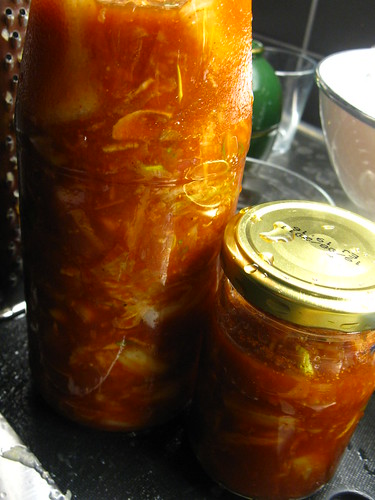
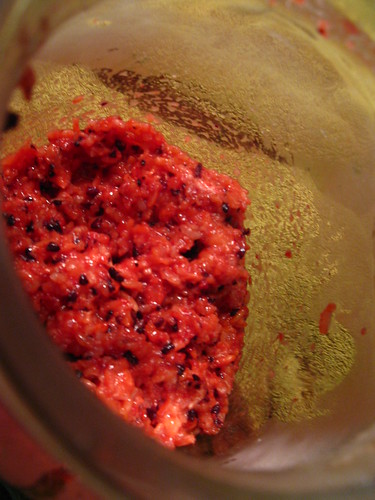
Then the finished product, looking steamy and warm:

looks promising

Can you see the fermented wine?

unwrapped rice wine

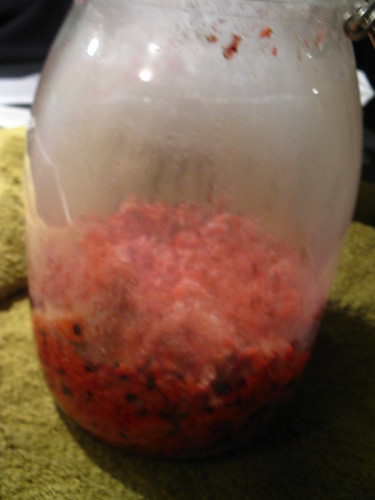
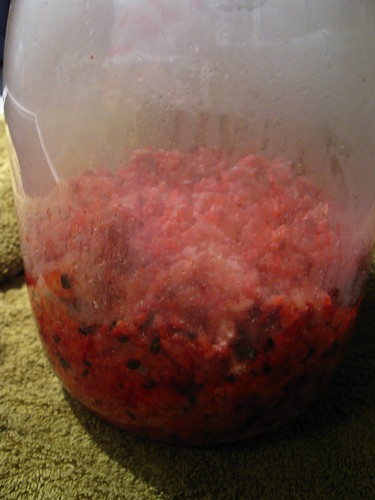
I decided it can sit another two days since Sweden has been -2 these past few days so I wrapped it up again and set it back and today this is how it looks like:


So we can declare it a successful project for this time :)


Tuesday, January 12, 2010

Chocolatey Brownie

IMG_4133


If you are looking for an easy dessert recipe, look no further than this! A favorite with most people I know, I made this 4 times in the month of December as a farewell/thank you treat for Johan's colleagues at the hospital where he interned and also for a friend's birthday party. It goes very well with vanilla ice cream or freshly whipped cream and you can prepare this in advance, just warm it up a little in the microwave. It freezes very well too and I have a few made in the shape of muffin cups resting in my well-stocked freezer right now for those unexpected visits from friends.

I finally migrated this recipe from my old blog, and just one tip if you are using nuts, try to dry roast them first either in a pan over the stove or in the oven. I was lazy to chop up the nuts so you can tell from the tray the little indentations were from the almonds, so do feel free to make any variation you desire.

I do not know whose recipe it came from but Sylvia, a friend from UK who is equally passionate about food sent it to me one day and there was no stopping from there. She recently added to our collection of Le Creuset cookware by blessing us with a storage jar in the same orangey red collection as a Christmas present :)

IMG_4134

Ingredients:
(pre-heat oven at 130 degree first)
1. 200gm unsalted butter (melt butter in a bowl until like liquid butter & MUST let it cool down before using)
2. 50 gm coco powder
3. 160gm caster sugar
4. 120gm plain flour
5. 4 eggs
6. 100gm roasted & coarsely chop walnuts (or pecan nuts or almonds which I've used this time round)
7. 1/2 teaspoon of salt (optional)
8. 1/2 teaspoon of baking powder

Directions:
1. Beat eggs lightly in a bowl & set aside.
2. Sieve flour & baking powder into a mixing bowl
3. Add in caster sugar, salt, coco powder, walnuts & mix them lightly

4. Pour in melted butter & eggs into flour mixture & use a large spoon to mix all well till you get a consistent mixture.
5. Pour mixture into a 8x8 inch square baking tin & bake at 130 degree for 35 minutes
6. Insert a skewer & it should come out clear & that's when brownies is done. Leave it to cool.

IMG_4131

Sunday, January 10, 2010

New York New York!

No, I haven't been there yet, though I plan to one day. However, I'm sure most of us have tried New York Cheesecake. The main difference I guess would be the sour cream layer right on top, which looks so tempting and glossy. I brought this to dinner with my family-in-grace and they topped it up with sliced strawberries - which makes it even more brilliant.

There was a mistake with this batch though, maybe you can't see it but I baked it at a higher temperature than intended. The cake didn't crack or anything which was great, but the crust was just a bit too hard. So take note of the temperature when you bake, check and double-check!

This is from my long time favorite baking site Joy of Baking.

My version is halved though, so please go to the original site if you want the full version:

New York Cheesecake

Crust:
100 grams of digestive biscuits (process whole cookies in a food processor until they are crumbs)
25 grams granulated white sugar
57 grams unsalted butter, melted

Filling:
350 grams or two packets cream cheese,original flavour at room temperature (use full fat, not reduced or fat free cream cheese)
100 grams granulated white sugar
1.5 tablespoons all purpose flour
3 large eggs, room temperature
40 ml heavy whipping cream
1/2 tablespoon lemon zest
1/2 teaspoon pure vanilla extract

Topping:
120 ml sour cream (not low fat or fat free)
1 tablespoon  granulated white sugar
1/4 teaspoon pure vanilla extract

Tips:  Sometimes the surface of the cheesecake cracks.  To help prevent this from happening do not overbeat the batter, especially when creaming the cheese and sugar. 


Another reason for cracking is overbaking the cheesecake.  Your cheesecake is done when it is firm but the middle may still look a little wet. 

Also, make sure the springform pan is well greased as cracking can occur if the cheesecake sticks to the sides as it cools. 


New York Cheesecake: Grease, or spray with Pam, a 9 inch (23 cm) springform pan.  Place the springform pan on a larger baking pan to catch any leakage while the cheesecake is baking. Preheat oven to 177 degrees C with rack in center of oven.


For Crust: In a medium sized bowl combine the graham cracker crumbs, sugar, and melted butter.  Press the crumbs evenly over the bottom and about 1 inch (2.5 cm) up the sides of the springform pan.  Cover and refrigerate while you make the filling.


For Filling: In bowl of your electric mixer place the cream cheese, sugar, and flour.  Beat on medium speed until smooth (about 2 minutes), scraping down the bowl as needed.  Add the eggs, one at a time, beating well (about 30 seconds) after each addition.  Scrape down the sides of the bowl. Add the whipping cream, lemon zest, vanilla extract and beat until incorporated.  Remove the crust from the refrigerator and pour in the filling.  Place the cheesecake pan on a larger baking pan and place in the oven.


Bake for 15 minutes and then lower the oven temperature to 120 degrees C and continue to bake for about another 1 1/2 hours or until firm and only the center of the cheesecake looks a little wet and wobbly.  Remove from oven and place on a wire rack.


Meanwhile, in a small bowl combine the sour cream, sugar, and vanilla extract.  Spread the topping over the warm cheesecake and return to oven to bake for 15 more minutes.  Remove from oven and carefully run a knife or spatula around the inside edge of pan to loosen the cheesecake (helps prevent the surface from cracking as it cools).


Let cool before covering with plastic wrap and refrigerating.  This cheesecake tastes best after being refrigerated for at least a day.

Friday, January 8, 2010

General Tso's Chicken - Spicy & Sour Chicken

This is sort of reminiscent of sweet and sour pork, only the method of marinating is different plus it doesn't have any sweetness to it. This is from Fushia Dunlop's Hunan dishes book and finally, a way to use tomato puree besides using it in bolognaise sauce :)

IMG_4534

Ingredients - Serves 2 as a main dish

4 chicken thighs or fillet about 340g
6-10 dried chili - cut into halves with most seeds discarded
2 teaspoon finely chopped ginger
2 teaspoon finely chopped garlic
2 teaspoon sesame seed oil
Enough oil for deep frying

Marinade for the chicken
2 teaspoon light soy sauce
1/2 teaspoon dark soy sauce
1 egg yolk
2 tablespoon potato flour
2 teaspoon oil

For the sauce
1 tablespoon tomato puree, mixed with 1 tablespoon water
1/2 teaspoon potato flour
1/2 teaspoon dark soy sauce
1.5 teaspoon light soy sauce
1 tablespoon clear rice vinegar
3 tablespoon stock or water

IMG_4532

Steps
  1. Slice the chicken meat into bit size about 0.5cm in thickness and stir in the marinade, adding the potato flour last. Set it aside.
  2. Prepare the sauce ingredients in a separate bowl and set aside and heat up the oil for deep frying.
  3. Add the chicken when it is hot enough and deep fry until it is crisp and golden. Remove them and set aside.
  4. Leave about 2-3 tablespoon of oil in the pan, make sure its not too hot and add the dry chili. Fry until you can smell the fragrance (takes just a few seconds), add in the ginger and garlic and stir fry for another 10 seconds until fragrant. Add in the sauce and stir as it thickens.
  5. Return the chicken to the wok and coat it evenly with the sauce, remove from heat and stir in the sesame seed oil before serving.

Tuesday, January 5, 2010

Spaghetti Tetrazzini

Spaghetti Tetrazzini

Johan's been working hard on his term paper and said he felt like some spaghetti today, any kind of spaghetti. So, I turned to another of the cookbook I got from him, Jamie Oliver's 'Jamie's Italy'. At first glance this book is full of a lot of grilling and seafood, but it's actually quite good for those who like pasta and Italien food because he does go into details into some of the cooking methods like for risotto. I decided to try this since I've just grilled a chicken yesterday and we had some porcini mushroom that I bought from our trip to Rome and haven't had the opportunity to try yet.

Dried Porcini mushrooms or Boletus edulis ...looks like Chinese dried mushroom but taste quite different. Porcini means piglets in Italien, did you know that? It's not 'fragrant' like the Chinese ones, but more earthly smell and taste....kinda intoxicating I would describe it. Probably the closest to describe it would be like a mushroom that has been stewed for a while, all condensed into one.

One thing that has to be said, I think his portions in this book is quite large!! The original recipe is said to serve 4, so I halved it and still I think I have enough to feed 4 persons. So here's the halved recipe:

Ingredients
10g of dried porcini mushrooms
splash of olive oil
2 chicken thighs, boned, skinned and cut into bit-sized pieces.(I used the grilled chicken thighs I had instead.)
salt and ground pepper
1 clove of garlic, peeled and thinly sliced
175g of mixed fresh mushrooms, cleaned, sliced or torn up
100ml of white wine
230g dried spaghetti
250ml of double cream
70g + 30g Parmesan cheese, grated
1 sprig of fresh basil, leaves only

Ingredients for Spaghetti Tetrazzini

Steps
  1. Preheat the oven to 200 degrees Celsius. Soaked the porcini mushroom in about 150ml of hot water, remember to retain the soaking water.Start boiling the water for cooking the pasta.
  2. Heat up a pan big enough to hold all the ingredients, and pour in the olive oil.
  3. Season the chicken with salt and pepper and brown them in the pan. You should add the pasta to cook in the other pot where the water is boiling, remember to salt the water.
  4. Add the drained porchini mushroom, garlic and fresh mushroom and stir fry them till the fresh mushrooms begins to soften.
  5. Add in the wine and the soaking water from the mushroom, and turn the heat down to simmer till the chicken is cook through and the wine has reduced a little.

    Simmering the chicken

  6. Check the pasta, it should be al dente. Turn off the heat if its already done.
  7. Add cream to the pan of chicken, bring it to boil and turn the heat off. Season it with salt and pepper, and drain the spaghetti and add it to the mixture and toss it well.
  8. Add in 70g of grated Parmesan cheese and the basil leaves and mix well. Transfer to an oven proof baking dish.
  9. Sprinkle with the remaining 30g of cheese making sure to cover the surface area and baked in the oven for about 15-20 minutes or until the top is golden brown and bubbling.


    Before baking Spaghetti Tetrazzini

  10. When done, drizzle with more olive oil and cheese before serving.
After taking one portion

Sunday, January 3, 2010

Qing Qing's Back-In-The Pot Pork - Hui Guo Rou

This is from another book I received as a Christmas present from Johan:


Its from the same author of the Szechuan recipes I had posted before. The thing I find about Hunan dishes is that there are a few that I am already making as home-cooked dishes, like pork-ribs soup, seaweed soup or white bait omelette. I thought it was just my family who makes it (and we are from Fujian, Putian - Xing hua). So I was kinda of surprised, but I'm not so good with geography so maybe they are not far from each other?

Anyway, this one was using spareribs originally, but Fushia Dunlop has adapted it to use sliced pork instead. So I'm sure it can apply for chicken too.

hui guo rou

Ingredients
400g pork belly without skin
3 spring onions, green parts only
10 garlic cloves, whole but peeled
50g fresh ginger with skin on
2 tablespoon black fermented beans or hian xi
1 tablespoon light soy sauce
1/2 teaspoon dark soy sauce
salt
Stock or water
2 fresh red chili or 1 chili padi sliced
1 teaspoon sesame seed oil
3 tablespoon cooking oil

Ingredients


Steps
  1. Blanched the pork belly in a saucepan of boiling water until it is cooked through. You will know when it is done when you poke through and the juices run clear. Drain and set aside to cool and sliced it thinly after.
  2. Cut the spring onions into 3-4cm sections, thinly slice the ginger (if you want to take off the skin, its optional)
  3. Heat the wok over high heat until it is smoking, then add the oil and swirl it round. Reduce the heat to medium before adding the garlic and ginger. Stir-fry until the garlic and slightly browned and you can smell the fragrance of the mixture. Add the pork slices and continue to stir fry until it is slightly golden brown.

    Back to the pot pork

  4. Add the black beans, soy sauces and salt to taste and continue to stir fry until the beans are fragrant. Add some stock or water if it starts to stick to the wok.
  5. Add the chili last and when you smell the fragrance of the chili, add in the spring onion greens. Stir fry for another 30 seconds or so when the spring onion is just cooked, removed from heat, stir in the sesame seed oil and serve with rice.

Budino Di Cioccolato

Hej hej!

I've been quite busy in the kitchen but haven't had the time to post it up. Guess what I got for my Christmas presents? 6 cookbooks from my dear husband so you'll be seeing more and more recipes from these books.

Thought I would start off with one of my husband's favorite dessert from one of my favorite cook Nigella. This one is from one of my Christmas present 'Nigella Express'. I loved watching the demonstrations on TV and finally, I don't have to scramble to scribble down all the measurements and ingredients.

Budino Di Cioccolato is actually chocolate pudding in Italien. It's easy and really good!


Ingredients
250ml full fat milk
125ml double cream
60g castor sugar
1 tablespoon (15ml) cornflour
35g cocoa powder
2 tablespoons boiling water
2 egg yolks
1 teaspoon vanilla extract
60g dark 70% cocoa solids chocolate, finely chopped

Steps
  1.  Boil up the water in a kettle while you warm the milk and cream together in a saucepan or a bowl in the microwave.
  2. In another bowl, mix the sugar, cornflour, cocoa powder together, then add in the 2 tablespoon of boiling water and whisk it into a paste.
  3. Whisk in the egg yolks one at a time with the paste, followed by the milk and cream mixture, then the vanilla extract.
  4. Pour the mixture into a saucepan and put it on low heat and cook while whisking continuously for about 3-4 minutes until the consistency resembles thickness like mayonnaise.
  5. Take it off the heat and add in the finely chopped chocolate before pouring into 4 small cups or glasses about 150ml in capacity each. Otherwise, just pour it into portions or containers of your serving choice.
  6. Cover the tops of the container with clingfilm, letting it rest on the chocolate surface to prevent a skin from forming and refrigerate them once they are cooler. Serve with a blob of cream on top if you like, make sure it's not fridge cold when you serve them.