Wednesday, May 26, 2010

Buttery Scones

http://singlishswenglish.blogspot.com/ - plain scones

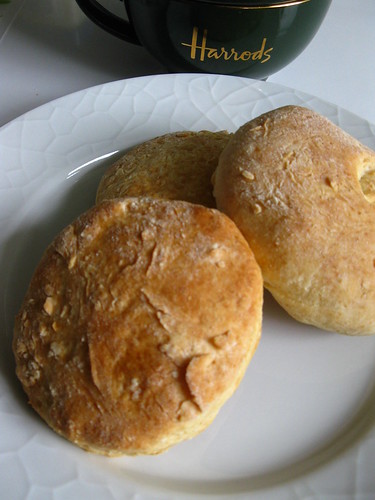
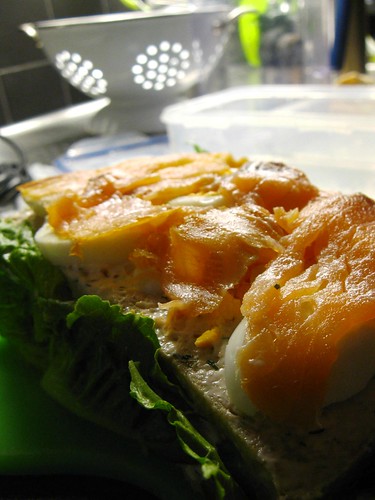
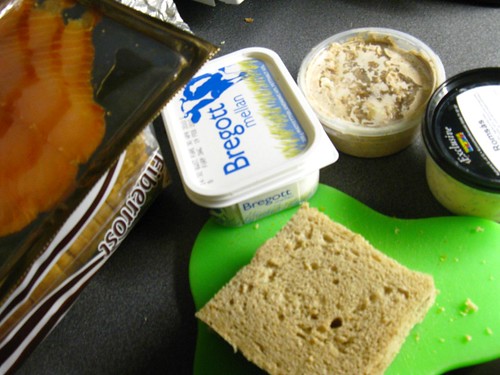
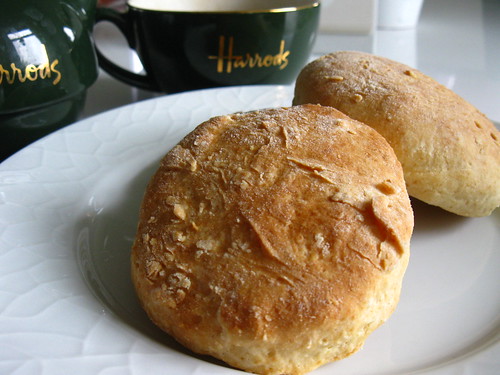
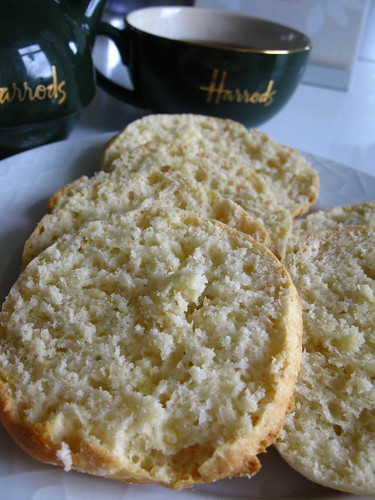
While out shopping with my sister-in-law the other day we pop into Espresso house (which is kinda of like Coffee Bean, Starbucks) for a light lunch and I had a scone with cream cheese and a cup of tea. That cost me about 15kr for a scone, not including the little tub of cream cheese and around 28kr for a big cup of tea. I don't go to cafes as often as I do in Singapore for the reason that I think they cost a bit much compared to what I can whipped up myself. Thankfully I found this really nice and easy recipe for scones at Anne's blog, the only problem is we seems to be running out of them very fast! I think the cost for making ten of them per batch comes up to be less than 25kr. So, if you like scones and want to make them yourself, this is quite foolproof, but do follow the instructions not to over knead the dough. You can have them simply buttered, or with cream cheese or with hard cheese and ham, like how Johan likes his.

När jag var ut och handlade med min svärsyster åkte vi till Espresso House att ta lätt lunch. Jag bestämde en scone med te och det kostade runt 48kr. Det var för mycket trodde jag, särskilt om jag jämför med hemmagjord bakverk. Jag var glad när jag hittade den här recept från Anne's blog  för att de smacka så gott att finna oss att äta upp de för snabbt!

Buttery Scones from food blog http://singlishswenglish.blogspot.com/

Ingredients
250 g flour
2 tsp baking powder
2 tsp sugar
1/2 tsp salt
60 g butter - cold!
1 egg
120 ml buttermilk (or if you're in Sweden, lätt filmjölk will work well.) (or just milk works too!)

Steps
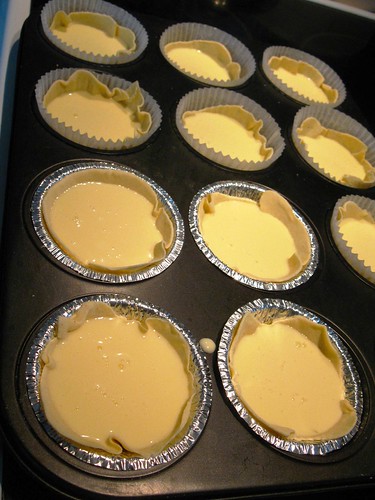
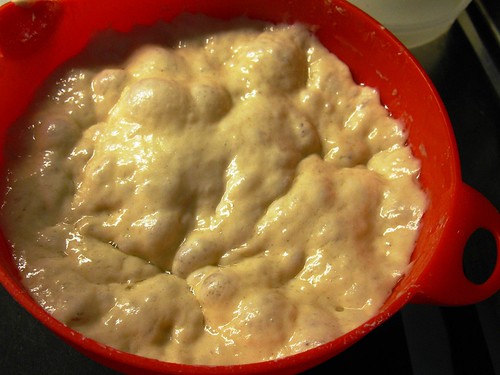
  1. Mix flour, baking powder, sugar and salt in a bowl. Add the butter in small dice, and mix until it's well distributed into the flour mixture. I simply use the tips of my fingers and rub it in like how you will make pastry. 
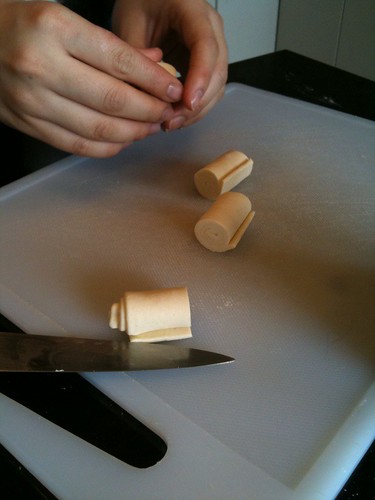
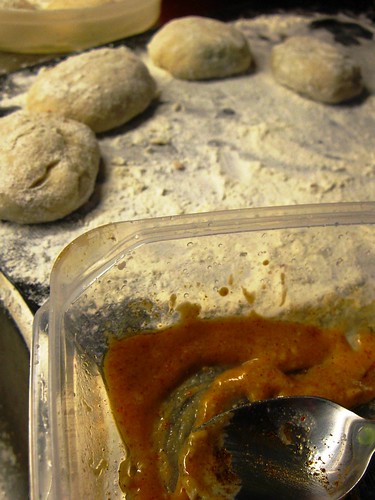
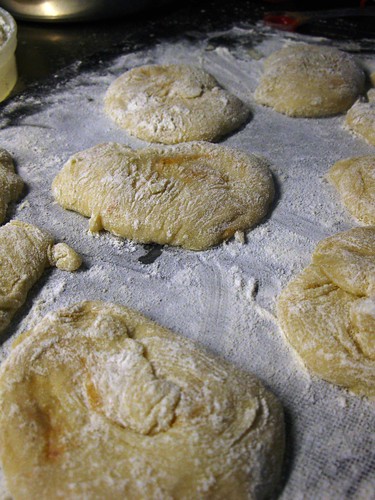
  2. Beat the egg with the buttermilk in a separate bowl and add to the flour. Mix into a soft dough, but don't overknead it. Flatten to a 2 cm thick rectangle, and cut out scones with a cookie cutter or a glass if you don't happen to have a round cutter.  
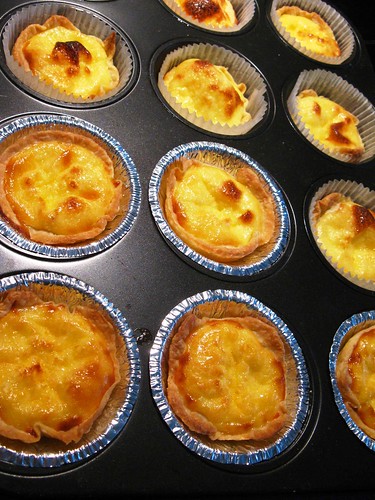
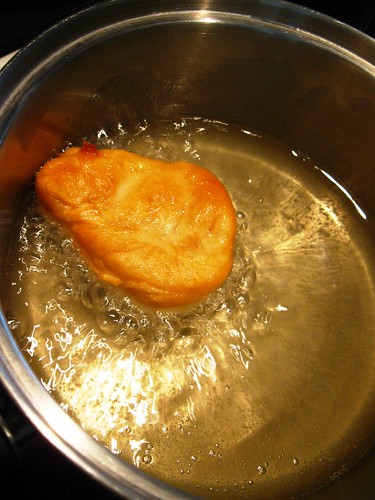
  3. Bake at 175°C for about 15-18 minutes. If you decide to eat them over the next few days, bake it just for 15 minutes and before eating it, heat it up for 3 minutes in an oven, nothing taste better than hot scones!
    http://singlishswenglish.blogspot.com/ scones and tea

Monday, May 24, 2010

Swedish Pancakes

IMG_5495

When Johan has Swedish food, it is essential that he has all components present, like having beetroots with pyttipanna, and of course pancakes with pea soup. The pea soup normally comes out of a can, you just add some thyme and heat it up, but the pancakes were home made, complete with some kind of preserves or strawberry or raspberry jam. Sounds strange? Not that strange, if you are interested in the pea soup recipe, do contact me although I have not tried it yet.

The first written Swedish record of pancakes according to the recipe book 'Very Swedish' was from 1538. They are typically smaller than normal pancakes which makes it perfect for outings or eating a lot of them!
If you ever spotted a pan with depressed round flattish circles normally made of iron, that's the traditional size and way of making the pancakes. My pan is still back in Singapore so I used an ordinary non-stick pan instead or maybe use Cuisinart Electric Skillet CSK-150, that would probably make this a breeze to do. These pancakes are quite versatile - can be eaten for breakfast, lunch, or as a snack.

När Johan had Svensk mat, måste han ha alla delar av rätten till exempel rödbetor med pyttipanna och naturligtvis pannkakor med ärtsoppa. Ofta använder oss ärtsoppa från burk men här har vi lagt pannkakor själv.

 Ingredients (serves 6)
 3 eggs
150ml cold water
1 teaspoon castor sugar
pinch of salt
60g flour
150ml milk
100ml heavy cream
2-3 tablespoon melted butter


Steps
  1. Whisk the eggs and water and add little by little the sugar, salt and flour.
  2. Mix in the cream and milk and let the mixture stand for 10 minutes.
  3. Brush the pan with some of the melted butter for the first batch and pour the rest into the mixture.
  4. Fry thin pancakes of about a cup size over medium heat. Turn over when you see holes forming.
  5. Serve it hot with whipped cream and jam/preserves.
  6. If you want to make your own blueberry preserves, just boil 2 cups of blueberries with 1 tablespoon of water for about 5 minutes, adding 120g sugar a little at a time. Pour into a hot jar and seal immediately, and when cooled in the chiller.
 IMG_5494

Friday, May 21, 2010

Stir Fried Spicy Suan Cai with lean pork

IMG_5547

This is one of those preserved Chinese vegetables that most of us remembers from childhood. There's another version of it which is xian cai, the salty version but this one is the sourish version, so there's no need to pre-soak it. This goes very well with plain porridge or rice and one important step that my Dad taught me was to pre-fried the sliced suan cai on its own first, without any oil to get rid of the 'watery' taste. This also helps makes it crunchier and tastier, in my opinion. As with all preserved food, its good to take this in moderation.

Suan cai är en kinesiska konserverad grönsaker som många kommer ihåg från ungdom för att de passar bra med ris och våra föräldrar ätit de när de var ung också. Du kan köpa de från Malmö Asien affären och kosta runt 12kr för en packet.

Ingredients
1 packet of suan cai (preserved chinese 'sour vegetable'), cut into strips
1 bird chili, sliced
1/2 tablespoon minced garlic
1/2 tablespoon minced ginger
1/2 tablespoon sliced shallots
200g lean pork, sliced to about same thickness as the suan cai and seasoned with salt and pepper and a lite corn starch
2 tablespoon cooking oil
1/2 teaspoon chicken stock powder
150ml water
potato/corn starch for thickening the sauce
Steps
  1. Warm up the pan over medium heat and tip the sliced suan cai in the pan and stir fry until all the water has evaporated.

    IMG_5540
  2. Pour in the oil and stir fry the vegetable till fragrant, then push it aside in the pan and add in the garlic, onions, ginger and chili. Fry it till fragrant, add in a little bit more oil if necessary.

    IMG_5542
  3. Add in the pork and stir fry the dish, mixing it thoroughly until the pork slices are about done and add in the water and stock powder. (If you have chicken stock, just add 150ml of it instead).
  4. Turn the heat down to simmer for about 5 minutes until it is cooked through.
  5. Before dishing up, make a corn starch or potato starch solution and pour about a teaspoon or two to thick up the sauce before serving it.

    IMG_5545


Thursday, May 20, 2010

Cola Chicken - Coke Kyckling

IMG_5538

可乐鸡 or Cola chicken - for those of us who have not heard of it may recoil at the sound of it at first but once you've tasted, its actually quite addictive. You only need 4 ingredients - ginger, coke, chicken and leeks and about 30 minutes later you have a great dish to go with rice or just as a snack. This was again prepared by Xinba Xin, so as you can see, living in Lund can be a little more 'international' than Singapore itself ;).

Låter konstigt? Det är inte så konstigt för att alla vet det är mycket socker i läsken. Vi bara använder det i matlagning nu och det kommer att bli lite söt men mycket gott! Den här passar bra med ris eller som 'finger food'.

Ingredients
3 chicken wings, separated into drumlets and wings 
1 tablespoon minced ginger
1 tablespoon minced leeks (white part)
1 tablespoon light soy sauce
200ml regular coke (not light nor zero - Johan's coke safe from being used in my cooking ;)

Steps
  1. Wash and clean the chicken wings, separate it and pat it dry with some kitchen paper.
  2. Heat up about 2-3 tablespoons oil in a pan and brown the chicken on both sides.
  3. When the chicken are about done, push it aside in the pan and add in the minced ginger and garlic and stir fry it until it is fragrant before adding in the soy sauce.
  4. Mix it well and add in the coke, bringing it to a boil first before turning down the heat and cover the pan to simmer for 20-25 minutes.
  5. The sauce should be reduced down to a caramel like thick sauce covering the chicken thoroughly.

    IMG_5536

Tuesday, May 18, 2010

Easy Egg Tarts

IMG_5480
Jag fick den här recept från min SFI kurskamrat som har lagat det när vi har en fest hos mig för två veckor sedan. Jag var precis sugen på dem. De här är vanlig i Singapore. Ibland har vi för frukost eller fika. Jag har haft recept på de men det behöver många steg därför att var jag låt att göra. Men hon visade till mig hur lätt det var och nu är jag beroende av det. Tack Xinba!

I got this recipe from a classmate from SFI when we had a gathering at my place two weeks ago. I was just longing for them and it is pretty common in Singapore when we have them as breakfast or as a teatime snack. I have a few recipe that tells me how to make it but it normally involves quite a few steps so I was quite lazy to try it out until this came along. Now I am addicted!! Thanks Xinba!

Ingredients eller svenska recept här
1 or a few pieces of defrosted ready made butter pastry (makes 10-12, also depending on the size of the ready made pastry)
2 to 4 large eggs (depending on how eggy you want it to taste)
200 ml cream
50g or 1/2 dl of sugar (Half of the big measuring spoon you get at IKEA, you can vary this depending on how sweet you like it)

Steps
  1. Roll up the dough along like a Swiss roll so you have like a long roll. Divide it up into 10-12 portions by slicing it like how you will slice up a Swiss roll. Each piece should be around 2cm in length.


    photo.jpg
    Pretty hands of Xinba demonstrating the size of each portion
  2. Flour the surface lightly before laying each piece flat side down (so you can see the swirls) and flatten it with the back of your palm. Using a rolling pin and roll it out thinly till it is large enough to fit into the pastry cups/egg tarts forms you will use for each individual tart.
  3. Press the roll-out dough against the cups/form and set aside while you prepare the filling.
  4. Combine the eggs, cream and sugar in a bowl and stir till the sugar dissolves. Preheat the oven to 200 degrees celsius.
  5. Fill in each egg tart pastry with the egg mixture till about 0.5cm below the brim of the pastry and place it carefully in the oven and bake it for 25-30 minutes or until it sets and is golden brown.


    IMG_5476
  6. Eat it while its nice and crispy or you can also heat it up in the microwave at a later time.


    IMG_5478

Wednesday, May 12, 2010

Smörgåstårta - Swedish Sandwich Cake (Shortcut version)

smörgåstårta med romsås

Äntligen! Ett svensk recept! Men kanske den här är en snabbt version för ätt jag varken bakade brödet eller gjorde såsen. Jag bara köpte allting och sätta ihop - även om jag har en riktig svensk receptbok som jag fått från Lisbeth, min kompis från Lund Universitet när vi studera tillsammans 2007. Hon är mycket snäll och gav oss en svensk receptbok och en asiatisk receptbok till vår bröllopsfest i Sverige trots att hon kan inte kom och firade med oss. Anledningen var så att vi kan laga mat till varandra rätter från varandra hemland.

Finally! A Swedish recipe - but it's a shortcut version because I neither bake the bread nor made my own sauce. I only bought and assemble everything together, and this is despite the fact I have a real swedish cookbook from a good friend, Lisbeth whom I met while I was studying at Lund University two years ago. She was very sweet and delivered the books personally to our wedding party in Sweden even though she wasn't able to make it on the actual day but the books (one swedish and one asian) were so that we can cook each other food from our own country.

Ingredients
5 slices wholemeal bread
Caviar sauce (romsås in Swedish, basically caviar mixed with dill, mayonnaise, pickled cucumber, creme fraiche), if you can't find that, try making your own by blending 150g cream cheese with 150 ml sour cream with a pinch of salt and ground white pepper.
Lettuce or some form of salad leaves (I had some roman salad)
Tuna in water (drained and mixed with some mayonnaise, salt and pepper - much like how you will prepare a tuna sandwich filling)
1 hard-boiled egg
butter for smearing on the bread
smoked salmon fillets, or cooked prawns

smörgåstårta stage 0

Steps 
  1. Cut off the crusts off the bread and butter each slice of bread.
  2. Begin by layering the first slice of bread with the tuna filling, the place the next slice of bread on top, and do the same layering with tuna filling again.


    smörgåstårta stage 1
     
  3. In my pictures, I had three layers of bread, and the other two slices I cut into halves to join it to the rest to form a rectangular shape to fit my container. However, you can basically do it in whatever permutation you wish. Spread the caviar sauce all round the sandwich cake.


    smörgåstårta stage 2

  4. Next, tear up the salad leaves and press it against the sides of the sandwich cake.


    smörgåstårta stage 3
  5. Sliced the hard-boiled egg and lay it evenly on top of the cake layer.


    smörgåstårta stage 4
  6. The final step is just spread the smoke salmon slices on top and you have it! Some people decorate with some fruits like grapes and uses cooked small prawns instead of salmon but its pretty much up to your own creativity.


    smörgåstårta stage 5

    Smörgåstårta
    Placed inside my lock lock to bring to share with my friends at school, eat it with a spoon or fork like a cake!

Tuesday, May 11, 2010

Nonya Chap Chai - Mixed vegetable - Blanda grönsaker

Mixed vegetable nonya style

Next up, chap cai or mixed vegetable in Nonya style is what I yearned for when I want something that will give me a comforting feeling. It can be considered a vegetarian dish and while the ingredients are very simple, it somehow just hit the notes like a perfectly tuned piano, which no words can describe.

Again, this was my first time making it and I was quite happy with the result, the sort of sweet-sourish, earthly taste with the crunch of the knots of dried lily flower buds. The crucial ingredient in this dish is again the fermented beancurd, which I've used in the making of ham chim peng. The book which I took this recipe from 'Home-made Nonya' by Patsie Cheong did not specify how long to fry the mixture of beancurd and sugar for but what I did was to fry it over medium heat, stirring constantly and the mixture will be like finely minced garlic size until it is slightly brown. The smell of it when you are frying - ermm...some of you may not like it but it definitely changed for the better when you add in the vegetables.

I didn't exactly follow the recipe's recommended amount for each portion of vegetable but I estimated by visualization, but the biggest part of the dish still consist of the cabbage.

Den här är en vegetariskt rätt som ger mig bekvämlighet känslor. Rätten är lagat i Nonya stil och har en viktig ingrediens - fermented beancurd som du kan köpa på asien affärer. Jag var njöd med rätten även om det var min förstå gång att laga det.

Ingredients
500g cabbage
30g lily buds (gim zhen) soaked, and knotted
20g black wood ear, soaked and sliced thinly
30g tang hoon (transparent rice noodles), soaked
5 dried Chinese mushroom, soaked and sliced thinly
2 pieces of fried beancurd sheet

1 piece fermented bean curd
1 teaspoon sugar
2 tablespoon light soy sauce
pepper to taste
2 cups of water

Steps
  1. Heat 2 tablespoon oil in a wok over medium heat and stir fry the bean curd and sugar until slightly brown and fragrant.
  2. Drain the vegetables thoroughly before adding in the cabbage, lily bulbs, wood ear and mushroom and fry evenly until the cabbage is softened. Add in the tang hoon and beancurd sheet next.
  3. Pour in the water, soy sauce and season with pepper and blend well with the vegetables. 
  4. Cover and let it simmer over low-medium heat until all the vegetables are cooked through and slightly soft. Serve hot with rice.


    Chap Cai

Monday, May 10, 2010

Ham Chim Peng/Ham Cheem Peng - Salty Fried Chinese Bread

Ham chim peng

I don't really know how to translate Ham Chim Peng to english...or swedish (fritera salt bröd?) for that matter but I do know my dad likes it and he buys a couple when he goes fishing on weekends. He has, however, been complaining about the price of it - from 40 cents till 80 cents I think, so maybe, just maybe I may make it for him when I go back. However, this requires kind of a starter dough, so start this process 2 days in advance.

It's not my recipe, but it is from Lily Wai's blog, she has tried different recipes so I felt fairly confident of hers and the only thing I adjusted was halve the amount and take a bit more photos of the in-between stage for those of you who wish to tried it.

What I found surprising was the use of toufu lu/fermented toufu/toufu cheese -  but I was glad to have brought that along because I used it to make chap cai too (post coming up next). The jian sui/alkaline water can probably be skipped if you can't find it, but I was prepared for it so it was pretty much just following the recipe for this. It was worth it though :)

Denna är en av min pappas favorit för att han ofta köper två stycke när han fiskar på helgerna. Jag kan inte översätter den här från kinesiska till svenska men kanske man kan kalla det fritera bröd? Men jag tar recept från Lily Wai's blog, då har hon provat olika recept samt har jag bara halverar och tog lite mer bilder.

Ham Chim peng with red bean filling

Ingredients
Starter
45 g all purpose flour
45 ml water
1 teaspoon vinegar 

Mix the starter till well blended, then cover it and leave it at room temperature to proof for two days.

Dough
180 g bread flour
65 g sugar
1/2 teaspoon bicarbonate of soda
1/4 teaspoon alkaline water
125 ml water
1/4 tsp instant yeast

Filling for salty version 
1/4 teaspoon 5 spice powder
1/4 teaspoon fermented beancurd
1/4 tsp oil
1/4 tsp salt
Mix the ingredients till well blended

Filling for sweet version
Red bean paste
 
Steps
  1. Mix all the dough ingredients well before adding in the starter. You should get a very soft and kinda sticky mixture.
  2. Cover the dough and rest for 20 minutes.
  3. After resting, use a spatula to bring the dough from the sides into the center and continue to do this until the dough is smooth. Rest 20 minutes again and do the folding and resting 3 more times.
  4. Rub some oil on the surface of dough, cover and let it proof for another 2 - 3 hours. Sprinkle 1 teaspoon of 5 spice powder and 1/2 teaspoon of salt and mix into the dough before using.


    Proofed dough for ham cheem peng
    Proofed dough
  5. Flour generously onto the surface where you are going to roll out the dough before pouring it out. 
  6. Divide the dough into two portions - one for the salty version, one for the sweet version.
  7. Roll the first portion of dough into a rectangle. Spread the blended salty filling on and roll up like a swiss roll.


    ham chem peng with red bean filling
    Salty version filling
  8. Slice the swiss roll dough into 1/2 inches slices and flatten it further with the palm of your hand or by stretching it gently just before you fry it.


    ham chim peng salted version with fu lu
    Rolled up like a swiss roll

    Ham chee peng salted version
    And flattened before frying
  9. For the other portion of dough, divide it into ping pong ball size portions. Flatten each portion with the palm of your hand and place a dollop of red bean paste in the middle, and seal up the dough ball thoroughly.
  10. Let them rest for another 10 minutes before heating up the oil on medium heat and fry them one or two at a time depending on how big your pot is. The oil level should be about half of the pot you are using.
  11. Before frying each piece, flatten or stretch them further with your hand gently and be careful when you place them in the oil. For the sweet version, press some sesame seeds in the middle of the dough pieces before frying it.
  12. Once you place the dough in the oil, use a long chop sticks and rotate it round and you should see the dough puffing up. Once it floats to the top, use the chopsticks and turn it over frequently till it is golden brown on all sides.


    Frying ham chee peng
  13. Sprinkle with salt while still hot (optional - if you like a saltier taste) for the salty version.

    Ham cheem peng


    Ham Cheem peng with red bean filling/plain
    Ham Chim Peng with red bean filling (left) and plain salty version (right)

Sunday, May 9, 2010

Pandanus amaryllifolius Chiffon Cake eller Pandan Cake

Pandanus amaryllifolius Chiffon Cake

I går kväll har jag en fest med min kompisar, när gjorde jag några Singaporean/Singlish mat. Det var Pandan Cake, Söt och Sur fläsk, Bak Kut Teh (soppa med revbensspjäll), Ham Chim Peng (friterade bröd med rödböner massa) och Chap Cai i nonya stil (blandad grönsaker). Det var rolig!

Jag tog med Pandan Paste från singapore som kommer från Pandanus amaryllifolius som är typiskt i sydöst Asien mat, särskilt i efterrätten. Denna är en chiffon tårta som använder bara oilja, ägg, söcker, mjöl och bakpulver samt är mycket lätt och mjuk. Om du kan inte hitta pandan paste, kan du använder apelsin skal i stället.


Last evening I had a few friends over and I made some Singaporean dishes - pandan cake, sweet and sour pork, bak kut teh, ham chim peng and chap cai in nonya style. It was quite fun and my friends also made their specialties.

I took some pandan paste in a bottle from Singapore. The really official name is Pandanus amaryllifolius but its only more common in southeast asia because my friends from China have not seen it before. This pandan cake is a chiffon cake version without coconut milk and relies on having your egg white beaten to stiff peak. One trick is to beat the eggwhites in a clean bowl till they have soft peaks then add the sugar in gradually till you are able to overturn the whole bowl over your head without it dropping at all. I can, however imagine all kinds of funny images if you failed to to that and did this test - just don't blame me la! hehe. Another variation you can do with this cake if you don't have pandan paste is to use fresh orange peel to make an orange chiffon cake instead. I think mine is kinda of half successful because I didn't have that browning all round, so if I do this again and find out anything, I will let you know.

This recipe is adapted from Patsie Cheong's Malaysian delicacies to fit into a small sponge cake tin.

Ingredients
2 egg whites
50g sugar

2 egg yolks
20g sugar
1/4 teaspoon pandan paste
1 teaspoon water

50g plain flour
1/4 teaspoon baking powder
2.5 tablespoon corn oil or rapeseed oil.

Steps
  1. Beat the egg whites till soft peak, then add 50g of sugar gradually till stiff peak.
  2. Beat the egg yolks together with the sugar, pandan paste and water until blended.

    Blending it up with pandan paste
  3. Add a dollop of egg white into the egg yolk mixture at first and mix it well, then fold in the rest of the egg white till blended. Take care not to over mix it.
  4. Stir in the flour, baking powder and lastly the oil.

    Pandan chiffon cake batter
  5. Preheat the oven at 150 degrees celsius. Pour the batter in the mould which should fill it about 3/4 of the way and bake for 1 hour.

    Traditional pandan cake pan
 Pandan cake

Friday, May 7, 2010

Cheese Bread Sticks (Grissini) - Ost Brödpinne

Breadsticks

Jag var mycket upptagen denna vecka - ett prov i måndags, en intervju i onsdags och nu måste jag plugga på SFI provet i maj. Eftersom jag är lite kort på tid därför kan jag inte uppdatera min blog så mycket.

Men här är Grissini eller brödpinne som jag har gjort för 3 veckor sedan. Gjorde jag brödpinne med cheddar ost och garnerade med sesam och vallmofrö. Först trodde jag att vi kan ha dem när vi ha gäst men Johan åt allt upp bara i några dagar. Sätt i gång! Prova denna :)!

I was quite busy this week, had a test on Monday, an interview on Wednesday and now I have to study really hard for the SFI test in May.

Here's something you can try making for your guests though, grisinni or bread sticks can be good to have around but Johan ate it all up within a few days after I made it 3 weeks ago.

This recipe came from Alex Goh's Magic Bread book:

Ingredients
60g bread flour
40g boiling water

Add the boiling water to the bread flour and blend well. Cover and let it cool before keeping in the chiller for at least 12 hours before you use it.

Dough
150g bread flour
90g plain flour
5g instant yeast
10g sugar
6g salt

130g cold water
15g butter (room temperature)
80g grated cheddar cheese

Steps
  1. Mix the dough ingredients (except the water, butter and cheese) together till well-blended.
  2. Add in the previously prepare water and flour dough into the mixture, then the cold water and the butter and knead till you get a smooth and elastic dough.
  3. Add in the grated cheese last and cover and let it proof for 20 minutes.
  4. Roll the dough out into 15 x 60 cm rectangular shape. 
  5. Cut the dough into 15 x 0.6 cm strips, stretching it strip and rolling it to about 18cm long.
  6. Place it into a baking tray lined with parchment paper, let it proof further for 15 minutes.
  7. Brush each strip with water, grind some coarse salt over and sprinkle some sesame seeds or poppy seeds over to garnish.

    Rows of breadsticks
  8. Bake at 180 degrees celsius for 10 minutes first. Then turn each strip over and bake for another 5 minutes or until the sticks turn golden brown.
  9. Let the bread sticks cool before putting it back in the oven at 120 degrees celsius for another 15 minutes to let it become dry and crispy.
Cheese Breadsticks