Sunday, June 6, 2010

Ham & Cheese Bread - Skinka & Ost Bröd

IMG_5303

This is such a common bread in Singapore that I remember it all the way from my childhood, where they sell for about 50 cents a piece and my mom will buy them for our breakfast for school the next day. The basic is a sweet dough which once successfully prepared you can vary it to have it contain red bean paste, or kaya, peanut butter, curry potatoes or luncheon meat...or anything you prefer. You can also shape it according to your creativity and for this one I did it by rolling the ham with a flat piece of dough like a Swiss roll, then fold it into half and cut it almost through the middle and open it up. You can do it like Breadtalk's flossy bread and have the toppings on the outside instead. They freeze well too and you need to warm it up only in the microwave.

I have tried and proven this recipe and I hope you will grow to like the versatility of it too! This is adapted from Alex Goh's Magic Bread:

Jag minnande den bröd från min barndom när min mamma köpte de för vår frukost. Den här är ett grundläggande recept för söt bröd och du kan använda vad du vill för fyllning. För recept i svenska, var gärna klickar här.

Ingredients
Sponge dough prepare 12 hours before
100g plain flour
70g boiling water

Mix both together until it forms a dough and once its cooled, cover and keep in the chiller for at least 12 hours before using.

400g plain flour
80g sugar
6g salt
9g dry yeast
20g milk powder
175g cold water
1 large cold egg (about 60g)
60g butter

Steps
  1. Take the sponge dough out of the chiller while you prepare the rest of the ingredients.
  2. Mix the flour, sugar, salt, dry yeast and milk powder well before adding in the cold water and egg to form a rough dough. You can do this with the dough hook if you have a machine or by hand otherwise.
  3. Tear up the sponge dough bit by bit and add it to the mixing bowl while the machine is running.
  4. Cut the butter into smaller pieces and add gradually to the dough mixture too until well incorporated.
  5. Cover and proof for 40 minutes before diving them up into portions about 55-60g each.
  6. Roll out each portion to be slightly larger than the slice of ham you have, and roll them up like a Swiss roll, fold into half and cut almost all the way through in the middle and open it up like a butterfly.
  7. Brush with egg wash for each bun and sprinkle grated cheese over. Let it rest for 10 more minutes while you preheat the oven to 190 degrees celsius. Bake for 12-15 minutes until golden brown.

    IMG_5300

Friday, June 4, 2010

Making Kim Chi - The Proper Kim Chi By Chef Ajin!

My feet's been hurting quite a bit and I don't know if its from the 3km walk I took in the forest the other day or just standing in the kitchen too long but I saw this Chef's Mat from Foodbuzz daily special and wondered if it would help in alleviating it. Did anyone try it before and how was it? Do write to me and let me know! O and a special hi to Denise who dropped me an email after reading my blog, it was very nice to hear from you!

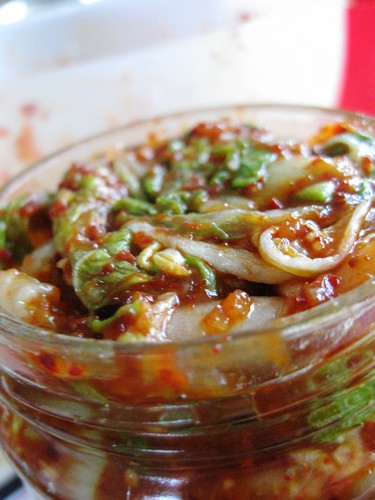
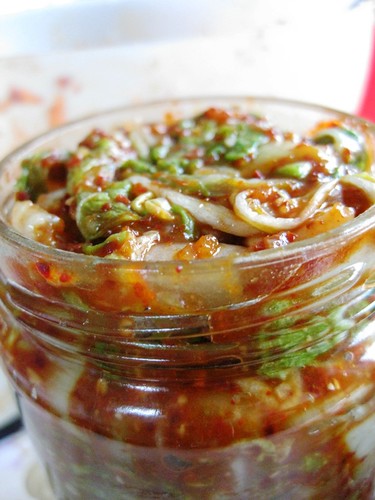
Finished kimchi by sasa

Anyways, I got to know a real Korean lady from the church group I am attending cell in Lund and she recently organized a Kim Chi making session at another friend, Lina's place. It was a great time of fellowship and I learnt another way of making Kim Chi. If you remember, I posted one before from a recipe I found on the internet and in it I substituted the Korean pepper powder with my own mix of paprika and chili powder. Still works but thought this is more authentic. So here are the steps taught by her and of course with real Korean pepper powder, which I also got some from here this time round. Thanks Ajin!

Jag träffade en riktig Koreanska kvinna, Ajin från kyrkan som jag delta i på bibel studie. Hon och en kompis Lina hade en kimchi session i förra vecka och jag lära sig rätt metod som man göra Kim Chi. Jag har gjort en förut men här man använder riktig Koreanska paprika pulver så det smacka bättre, tror jag. Det följa med bilderna vad vi har gjort.

Ingredients
1 large head chinese cabbage or napa cabbage or you can use white radish or cucumber but vary the amount of seasoning accordingly
1 dl coarse salt
3 dl cold water
2.5 tablespoons sugar
6 tablespoon Korean pepper powder
5 tablespoon fish sauce
about 1/2 onion, 4 garlic and 1 fresh chili blended into a paste
3-4 tablespoon cooked (1/2 dl flour & 1.5dl water) mixture
1/2 chopped onion and 1 spring onion for mixing in the end


Steps
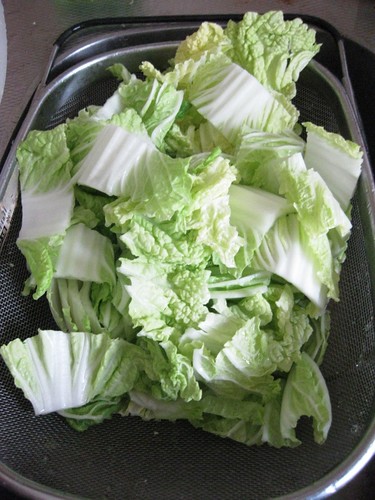
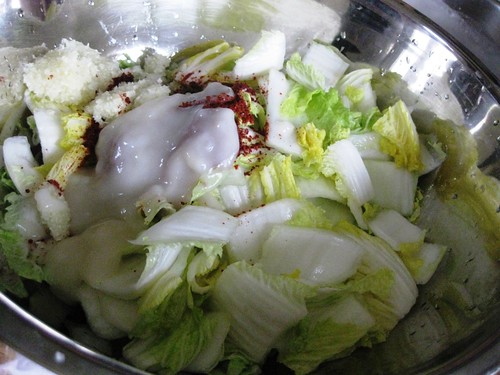
  1. Cut the lettuce or cucumber into quite large chunks and add the salt and water and 'massage' the vegetables thoroughly. Leave it to rest for about 2 hours.
    Preparing the chinese lettuce
    Salted cucumber
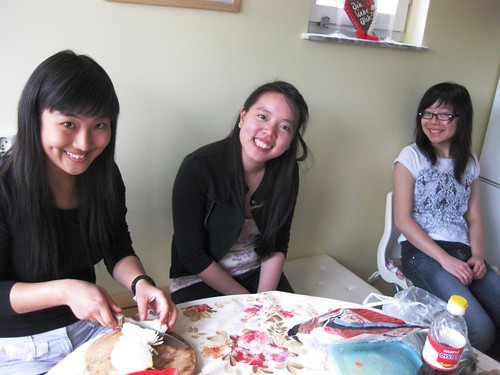
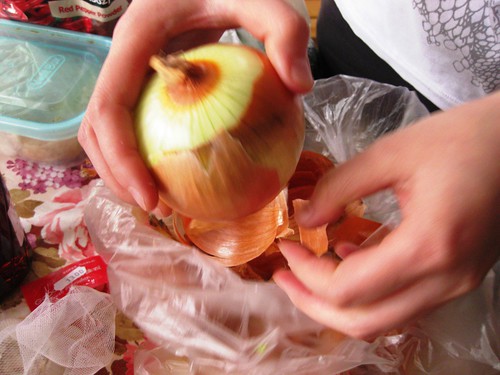
  2. While waiting, prepare the onion and garlic mixture and just sit around and talk or take pictures like us :)
    The students
    Peeling the onions
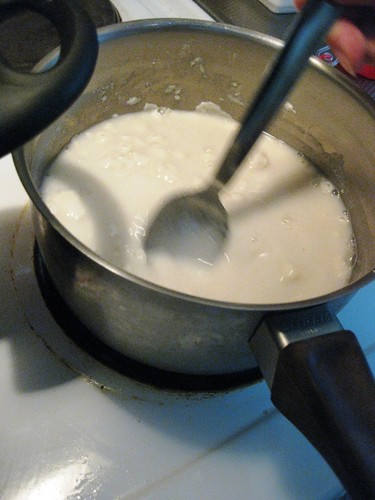
  3. Also prepare the flour and water mixture by cooking it in a small pot. It should be a thick mixture but not hard like cooked glue!
    Flour solution
  4. After the 2 hours wait, wash and squeeze as much water out of the vegetable or cucumber as possible. It is also possible to taste these pickled vegetables now to see if they are salty enough. Rule of thumb is your own test buds eventually, the amount given are just guidance and you are free to vary as you like.
  5. This brand (looks like the roof of the house) is supposedly to be one of the better ones for Korean paprika powder, so try to find that if you can.

    Korean Chili Powder

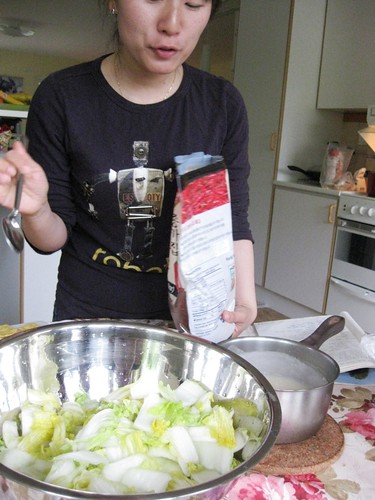
  6. So the last stage is just to assemble, prepare a large bowl to do this, as Chef Ajin will tell you... (do note the steps are same for the cucumber or radish version but you have to vary the seasonings according)
    Explaining the steps
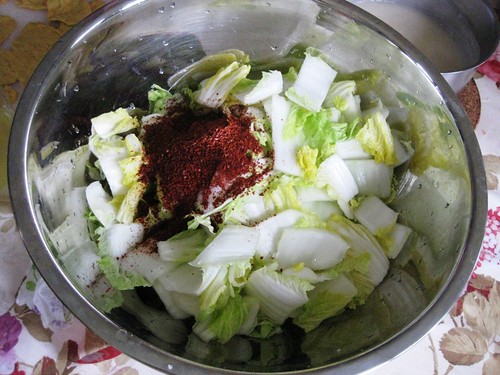
  7. First add the pepper powder:
    Adding the chili powder to the prepared cabbage
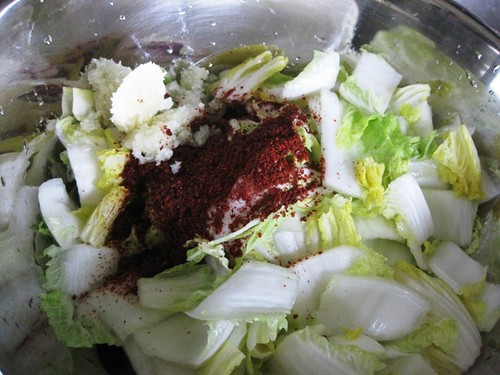
  8. Then the garlic and onion mixture:
    Adding the garlic and onion mixture
  9. Next the cooked flour & water mixture:
    Adding the flour mixture
  10. Finally, sugar and fish sauce. This part is a balancing act, so add more or less depending on how salty or spicy you want your Kim Chi to be.
    Adding the sugar
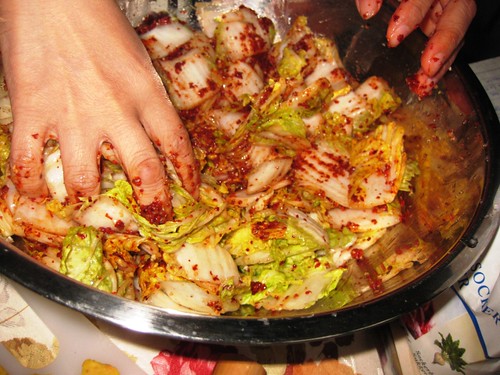
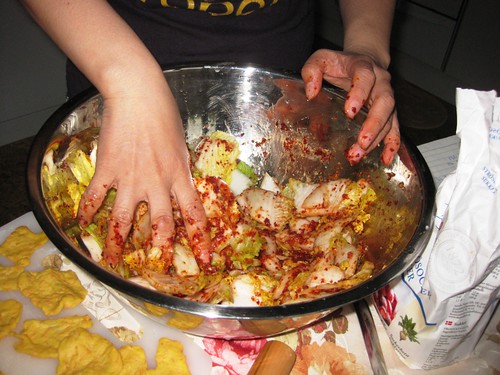
  11. Put on gloves at this stage if your hands are sensitive and wash your hands and dry them before you mix everything thoroughly, being careful not to bruise the vegetables too much. You can also try tasting and adjust the seasoning accordingly to your preference. Remember, taste, taste, taste!

    Mixing it up
    Its done! 
  12. Remember to store them in clean containers in the fridge and they can last you for a couple of months. The longer you store them, the more fermentation occurs and it will carry the sourish familiar tinge.

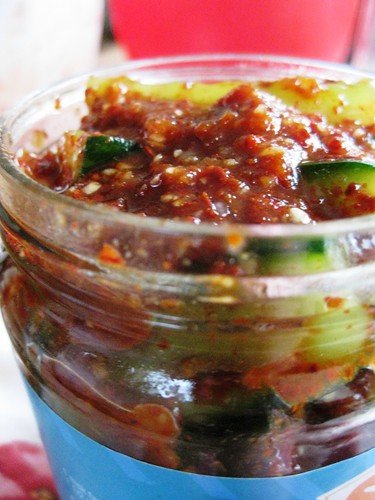
    Cucumber kimchi

    Bottled kimchi

Thursday, June 3, 2010

Banana Walnut with Chocolate Cupcake - Banan med Valnöt och Choklad Muffin

IMG_5490

Bananas are on sale most of the time here and we always buy a bunch to have on our fruit plate. Sometimes, they turn brown before we have any desire to eat them and this is one good recipe to make use of brown bananas - which are very sweet and fragrant for baking purposes. I tweak the recipe which I got from Alex Goh's Baking Codes to include chocolate because that's Johan's favorite combination. Instead of using cupcake trays, you can do this like a banana loaf bread too! Just use a loaf tin instead ;). I like this recipe also because you basically only need one bowl instead of the normal 2 bowls because of the need to separate the dry and wet ingredients for cupcakes.

Den här är ett gött som du kan göra om du här mogna banan. Jag här byta receptet en lite för att Johan älskar banan och choklad kombination. För recept i svenska, du kan gå här.

Ingredients - Makes about 24 standard size cupcakes
2 eggs
200g sugar
250g banana
1/4 teaspoon salt
90g milk
250g plain flour
2 teaspoon baking powder
1/2 teaspoon baking soda
150g corn oil or any neutral flavour cooking oil
80g dry roasted, chopped walnuts
80g chopped chocolate

Steps
  1. Whip the eggs with the sugar until light and fluffy.  
  2. Mash up the banana and add it to the egg mixture with the salt and whip until thick.
  3. Blend in the milk well and add in the flour, baking powder and baking soda until well combined.
  4. Add in the oil until incorporated and then add in the chocolate and walnuts, leaving a handful of walnuts for sprinkling on top of the cupcakes.
  5. Line your cupcake tray with paper cups, and butter the top of the tray only, along the sides so the batter will not stick if it overflows. Fill up each cup to about 3/4 of the way, topping it with walnuts.
  6. Pre-heat your oven to 180 degrees celsius, bake it for 25-30 minutes until nice and golden brown.
    IMG_5487

Tuesday, June 1, 2010

Tiramisu or Pick-me-Up

I just received great news today so feeling extremely happy. This would be a dessert that would fit my mood right now :) So far the best one I have tasted is at Raffles Hotel where you can get it at their Seah Street's deli. I specially requested for it for my wedding last August and I was very glad when they actually send it up to us after the wedding lunch because we didn't have time to eat but my 'sisters' love them too!

I got this recipe from a brother in Christ from New Creation Church, Weixin, who is a great cook, a great photographer and recently became father too! So I dedicate this blog post to him, his wife Wendy and their lovely son Zach! (whom I have not met yet!)

Och om du behöver den recept i svenska, du kan hitta det här

Pick me up dessert http://singlishswenglish.blogspot.com/

Ingredients

2 cups or 500ml strong coffee, cooled to room temp
3 tablespoons Amaretto Liquor
2 eggs, separated
30g caster sugar
250 g mascarpone cheese
1 cup cream
250 g ladyfingers or savoiardi (you may vary this according to the container you will eventually serve it in, at times you can also break up the biscuits to fit it)
cocoa powder, for dusting

Steps

1. Put the egg yolks and sugar in a large bowl and beat with electric mixers until the mixture goes pale and thick.

2. Add marscapone (which should be at room temperature) and beat until combined.

3. Whip the cream until stiff peaks and fold gently into the egg mixture.

4. Beat the egg whites to soft peaks in a perfectly clean metal bowl.

5. Fold the whites into the cream.

6. For serving you can use a big dish or individual glasses. Prepare a dish which you mix up the coffee and liquor in which you can dip the ladyfingers in.

7. Dip biscuits in coffee one at a time. Do this quickly and turn the biscuit once only because it absorbs very fast and turns soggy if there's too much liquid. Drain well.

8. Layer in your dish or glass (breaking it into appropriate sizes), covering the whole bottom.

9. Place one third of the marscapone mix on top and spread out.

10. Repeat with remaining biscuits and marscapone, finishing with a creamy layer.

11. Smooth surface with a spatula and dust with cocoa just before serving using a small sieve containing the cocoa powder and tap over each glass or the container gently.

12. Refrigerate for at least 2 hours, but it works quite well if you leave for up to 24 hours.

Tiramisu_ http://singlishswenglish.blogspot.com/ 

Wednesday, May 26, 2010

Buttery Scones

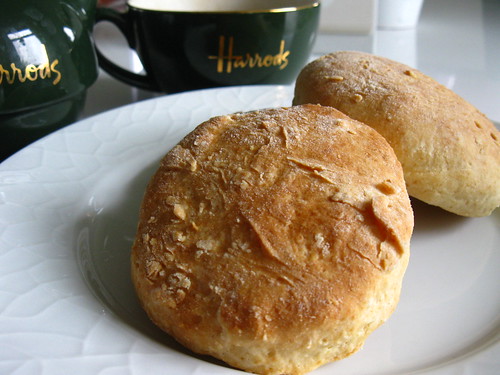
http://singlishswenglish.blogspot.com/ - plain scones

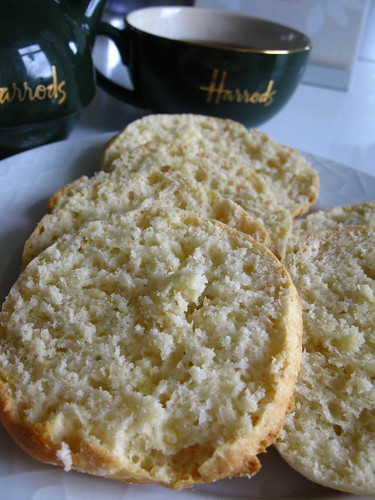
While out shopping with my sister-in-law the other day we pop into Espresso house (which is kinda of like Coffee Bean, Starbucks) for a light lunch and I had a scone with cream cheese and a cup of tea. That cost me about 15kr for a scone, not including the little tub of cream cheese and around 28kr for a big cup of tea. I don't go to cafes as often as I do in Singapore for the reason that I think they cost a bit much compared to what I can whipped up myself. Thankfully I found this really nice and easy recipe for scones at Anne's blog, the only problem is we seems to be running out of them very fast! I think the cost for making ten of them per batch comes up to be less than 25kr. So, if you like scones and want to make them yourself, this is quite foolproof, but do follow the instructions not to over knead the dough. You can have them simply buttered, or with cream cheese or with hard cheese and ham, like how Johan likes his.

När jag var ut och handlade med min svärsyster åkte vi till Espresso House att ta lätt lunch. Jag bestämde en scone med te och det kostade runt 48kr. Det var för mycket trodde jag, särskilt om jag jämför med hemmagjord bakverk. Jag var glad när jag hittade den här recept från Anne's blog  för att de smacka så gott att finna oss att äta upp de för snabbt!

Buttery Scones from food blog http://singlishswenglish.blogspot.com/

Ingredients
250 g flour
2 tsp baking powder
2 tsp sugar
1/2 tsp salt
60 g butter - cold!
1 egg
120 ml buttermilk (or if you're in Sweden, lätt filmjölk will work well.) (or just milk works too!)

Steps
  1. Mix flour, baking powder, sugar and salt in a bowl. Add the butter in small dice, and mix until it's well distributed into the flour mixture. I simply use the tips of my fingers and rub it in like how you will make pastry. 
  2. Beat the egg with the buttermilk in a separate bowl and add to the flour. Mix into a soft dough, but don't overknead it. Flatten to a 2 cm thick rectangle, and cut out scones with a cookie cutter or a glass if you don't happen to have a round cutter.  
  3. Bake at 175°C for about 15-18 minutes. If you decide to eat them over the next few days, bake it just for 15 minutes and before eating it, heat it up for 3 minutes in an oven, nothing taste better than hot scones!
    http://singlishswenglish.blogspot.com/ scones and tea

Monday, May 24, 2010

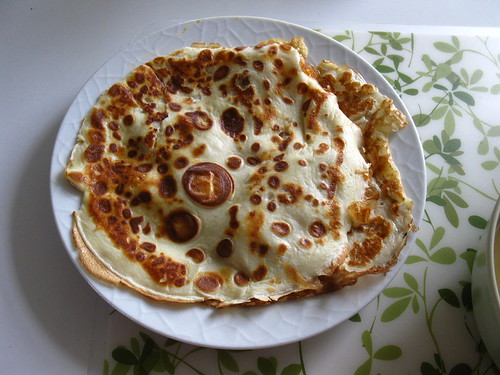
Swedish Pancakes

IMG_5495

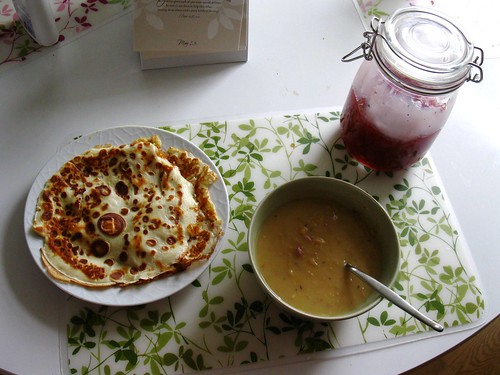
When Johan has Swedish food, it is essential that he has all components present, like having beetroots with pyttipanna, and of course pancakes with pea soup. The pea soup normally comes out of a can, you just add some thyme and heat it up, but the pancakes were home made, complete with some kind of preserves or strawberry or raspberry jam. Sounds strange? Not that strange, if you are interested in the pea soup recipe, do contact me although I have not tried it yet.

The first written Swedish record of pancakes according to the recipe book 'Very Swedish' was from 1538. They are typically smaller than normal pancakes which makes it perfect for outings or eating a lot of them!
If you ever spotted a pan with depressed round flattish circles normally made of iron, that's the traditional size and way of making the pancakes. My pan is still back in Singapore so I used an ordinary non-stick pan instead or maybe use Cuisinart Electric Skillet CSK-150, that would probably make this a breeze to do. These pancakes are quite versatile - can be eaten for breakfast, lunch, or as a snack.

När Johan had Svensk mat, måste han ha alla delar av rätten till exempel rödbetor med pyttipanna och naturligtvis pannkakor med ärtsoppa. Ofta använder oss ärtsoppa från burk men här har vi lagt pannkakor själv.

 Ingredients (serves 6)
 3 eggs
150ml cold water
1 teaspoon castor sugar
pinch of salt
60g flour
150ml milk
100ml heavy cream
2-3 tablespoon melted butter


Steps
  1. Whisk the eggs and water and add little by little the sugar, salt and flour.
  2. Mix in the cream and milk and let the mixture stand for 10 minutes.
  3. Brush the pan with some of the melted butter for the first batch and pour the rest into the mixture.
  4. Fry thin pancakes of about a cup size over medium heat. Turn over when you see holes forming.
  5. Serve it hot with whipped cream and jam/preserves.
  6. If you want to make your own blueberry preserves, just boil 2 cups of blueberries with 1 tablespoon of water for about 5 minutes, adding 120g sugar a little at a time. Pour into a hot jar and seal immediately, and when cooled in the chiller.
 IMG_5494

Friday, May 21, 2010

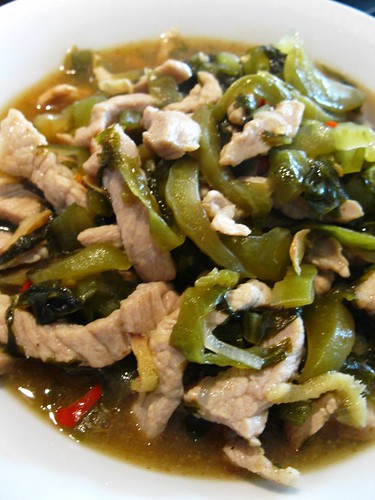
Stir Fried Spicy Suan Cai with lean pork

IMG_5547

This is one of those preserved Chinese vegetables that most of us remembers from childhood. There's another version of it which is xian cai, the salty version but this one is the sourish version, so there's no need to pre-soak it. This goes very well with plain porridge or rice and one important step that my Dad taught me was to pre-fried the sliced suan cai on its own first, without any oil to get rid of the 'watery' taste. This also helps makes it crunchier and tastier, in my opinion. As with all preserved food, its good to take this in moderation.

Suan cai är en kinesiska konserverad grönsaker som många kommer ihåg från ungdom för att de passar bra med ris och våra föräldrar ätit de när de var ung också. Du kan köpa de från Malmö Asien affären och kosta runt 12kr för en packet.

Ingredients
1 packet of suan cai (preserved chinese 'sour vegetable'), cut into strips
1 bird chili, sliced
1/2 tablespoon minced garlic
1/2 tablespoon minced ginger
1/2 tablespoon sliced shallots
200g lean pork, sliced to about same thickness as the suan cai and seasoned with salt and pepper and a lite corn starch
2 tablespoon cooking oil
1/2 teaspoon chicken stock powder
150ml water
potato/corn starch for thickening the sauce
Steps
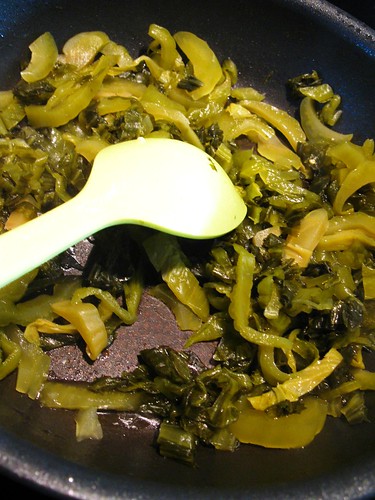
  1. Warm up the pan over medium heat and tip the sliced suan cai in the pan and stir fry until all the water has evaporated.

    IMG_5540
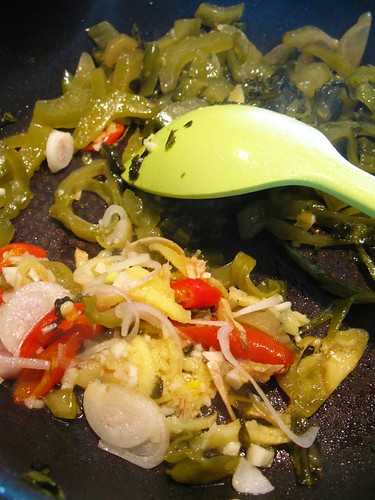
  2. Pour in the oil and stir fry the vegetable till fragrant, then push it aside in the pan and add in the garlic, onions, ginger and chili. Fry it till fragrant, add in a little bit more oil if necessary.

    IMG_5542
  3. Add in the pork and stir fry the dish, mixing it thoroughly until the pork slices are about done and add in the water and stock powder. (If you have chicken stock, just add 150ml of it instead).
  4. Turn the heat down to simmer for about 5 minutes until it is cooked through.
  5. Before dishing up, make a corn starch or potato starch solution and pour about a teaspoon or two to thick up the sauce before serving it.

    IMG_5545